To assign a domain, you need to do 2 steps, firstly assign the domain to the Website builder package, secondly point the domain to the correct IP address via DNS. We will help you with these steps easily in a few clicks in the following article.
Assigning a domain to a package
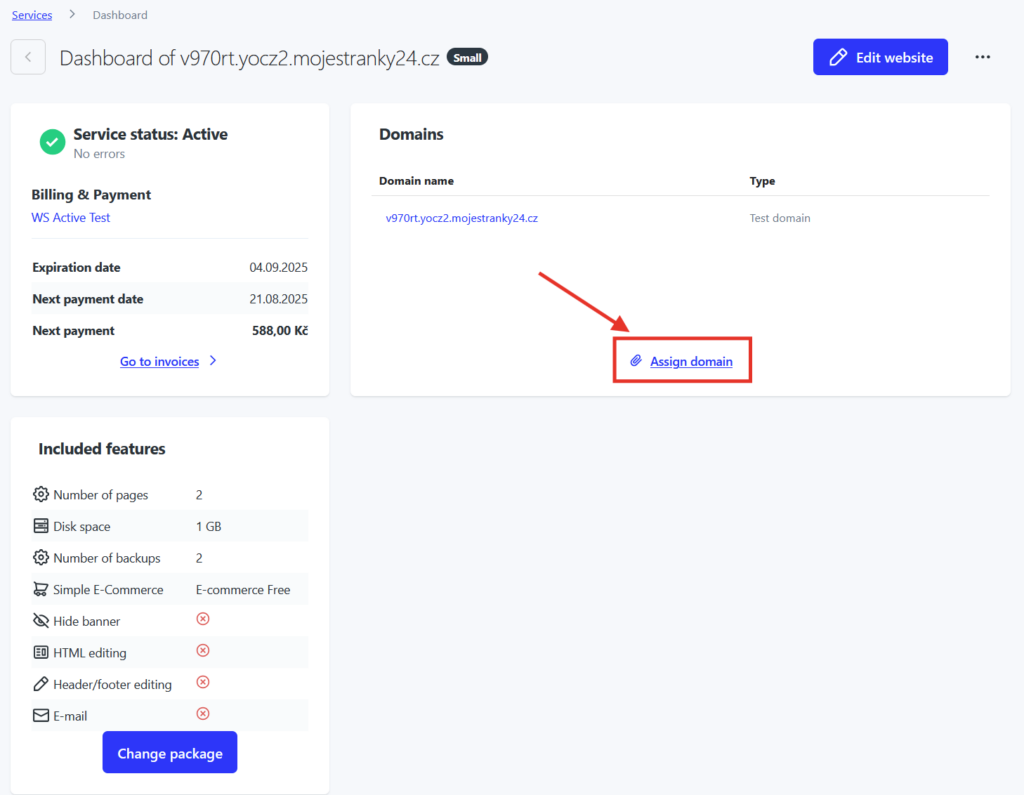
The first step with new hosting is to assign the domain to the website builder. This action will allow you to display the site on your domain instead of the temporary address that is assigned as the domain name by default.
You can assign a domain in the administration
- Log in to Webadmin
- In the Services section, click on the Website Builder package
- On the home page of Website Builder, select Assign Domain from the Domains section, see image
- Enter the domain name and confirm via the “Add Domain” button
Domain routing via DNS
Quick settings
If you have your domain managed by us, simply set up the correct DNS records through our quick configuration.
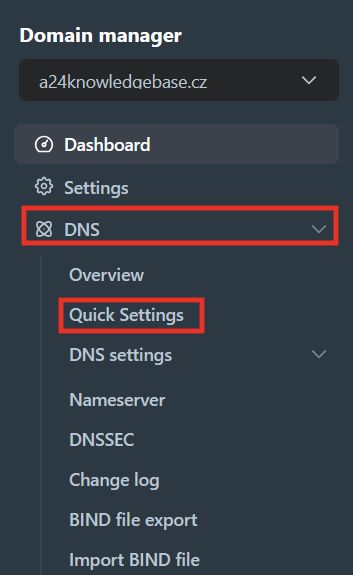
- Log in to your Webadmin account
- In the Services section, click on your domain
- Go to the DNS section in the left menu and select Quick Settings
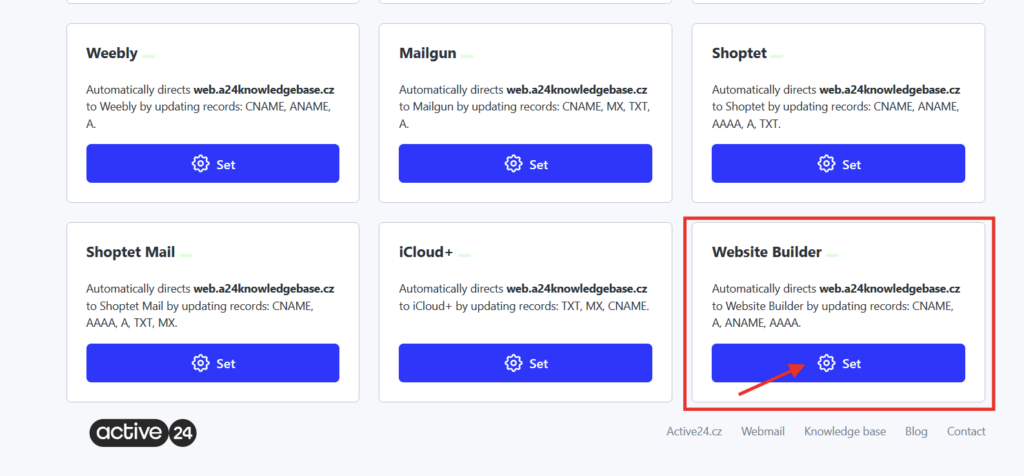
4. In the overview, scroll down the page and select Website Builder (bottom right)
5. Click Setup. You will see the records to be changed and now you just need to confirm the change via the “Continue” button
Manual settings
If you have foreign nameservers setup for your domain and you don’t have the domain managed by us, you need to manually set up DNS records. An overview of DNS records can be found below. Instead of example.com, enter your domain name. Alternatively, contact your nameserver administrator to have the DNS records set up for you.
A records
for domain: example.com
TTL: 600
IP address: 104.18.127.89
for domain: www.example.com
TTL: 600
IP address: 104.18.127.89
CNAME
for domain: _acme-challenge.example.com
TTL: 600
value: example.com.4ec378aa5a5a690c.dcv.cloudflare.com