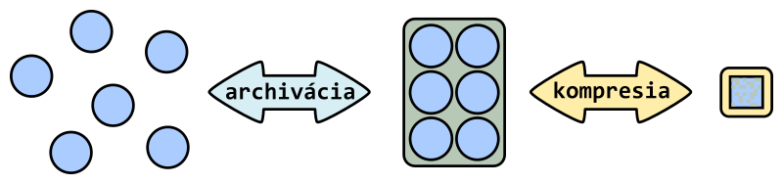
For decades we are accompanied by computers, that produce more and more information. At the beginning it was only a low number of files and with small size. Therefore it was enough to order the data to a compact archive. Often these files were stored on the tape cartridges, that are used in modernised form till today. From the software perspective a popular tool TAR (Tape ARchive) was used back then and is still used now for transferring the data. It can create from many files and directories a single file with a .tar (archive) extension.
Since the amount of data increased over the years, it was necessary not only to order the data to an archive but also to decrease the size (compress, pack), so you can fit more of data to a single tape cartridge. For that reason, tools like gzip, bzip2, xz, lzip, lzma, zstd or compress came to be. These tools are able to compress the created archive in TAR form, to reduce its size. For example the archive stored in archive.tar with the 1 GB size will be archive.tar.gz after compression at it will be smaller at the size of 0,5 GB. By compressing with the gzip tool we have saved half of the space.
Let’s archive with the tool GNU TAR
Today instead of tape cartridges, there are commonly used other storages both online and offline, but the procedure of archiving remains the same. We will show you how to use the archiving tool GNU TAR in version 1.30 in Ubuntu 20.04. The tool is preinstalled on most of the Linux distributions.
Firstly we need to secure the updates of all packages. Install updated software with two commands in one line:
sudo apt update && sudo apt upgrade
If the system finds updated packages, it will ask you, whether you want to install them:
Do you want to continue? [Y/n]
Press the key y if you want to start the update process or press n key if you do not want to install them. Then press Enter.
In the home directory create the structure of directories and download files to them, that we will archive and compress:
mkdir -p ~/archiv/video ~/archiv/audio ~/archiv/obrazky ~/archiv/ostatne
curl -o ~/archiv/video/video.mp4 https://file-examples-com.github.io/uploads/2017/04/file_example_MP4_1920_18MG.mp4
curl -o ~/archiv/audio/audio.mp3 https://file-examples-com.github.io/uploads/2017/11/file_example_MP3_5MG.mp3
curl -o ~/archiv/obrazky/obrazok.jpg https://file-examples-com.github.io/uploads/2017/10/file_example_JPG_2500kB.jpg
curl -o ~/archiv/obrazky/obrazok.png https://file-examples-com.github.io/uploads/2017/10/file_example_PNG_3MB.png
curl -o ~/archiv/obrazky/obrazok.svg https://file-examples-com.github.io/uploads/2020/03/file_example_SVG_30kB.svg
curl -o ~/archiv/ostatne/dokument.docx https://file-examples-com.github.io/uploads/2017/02/file-sample_1MB.docx
curl -o ~/archiv/ostatne/tabulka.xlsx https://file-examples-com.github.io/uploads/2017/02/file_example_XLSX_5000.xlsx
curl -o ~/archiv/ostatne/prezentacia.pptx https://file-examples-com.github.io/uploads/2017/08/file_example_PPT_1MB.ppt
Now we store the directory structure along with the files from the archiv directory using the tool GNU TAR to archive (file) called archiv.tar (first line) and check, if the file archiv.tar contains all files and directories (second line). At the end we write down the size of the file archiv.tar (fourth line), so we could compare it with the size of the original file archiv (third line).
tar cf ~/archiv.tar ~/archiv
tar tf ~/archiv.tar
du -s ~/archiv
du -s ~/archiv.tar
After the size comparison of the directory archiv and file archiv.tar we have discovered, that we have saved diminishingly small amount of space. The advantage is, that we have the whole structure of directories with files in a single file (archiv.tar) and we can copy it more easily.
We have created the archive, compared its size with the files in the directory and now we will unpack the file to a file archiv-tar (first line). We will check if after the unpacking we receive the whole directory structure (second and thirs line):
tar xf ~/archiv.tar --one-top-level=archiv-tar
du ~/archiv
du ~/archiv-tar
After unpacking the archive to the directory archiv we discovered, that the directories archiv and archiv-tar are identical with the structure of directories and files as well as size. The archiving process (creating, displaying content and unpacking) worked correctly.
Let’s compress with the tool GNU TAR
AS we have reminded, the advantage of archive is in the easier manipulation of the data. To this advantage we can add two more: compressing the archive (saving storage space), which leads to faster transfer of the data. Created archive archiv.tar can be compressed (shrinked, reduced) by different means. Most commonly used are gzip, bzip2 and xz.
Let’s create an archive, that we will compress with the gzip method (first line), then by bzip2 (second line) and at the end b xz (third line):
tar cfz ~/archiv.tar.gz ~/archiv
tar cfj ~/archiv.tar.bz2 ~/archiv
tar cfJ ~/archiv.tar.xz ~/archiv
Now we compare the compressed archives with the uncompressed archive:
du -s ~/archiv.tar && du -s ~/archiv.tar.bz2 && du -s ~/archiv.tar.gz && du -s ~/archiv.tar.xz
and we will discover, that the uncompressed archive (archiv.tar) has bigger size. Compressing methods has reduced the archive’s size, while the least successful was the bzip2 method (archiv.tar.bz2), better was gzip (archiv.tar.gz) and the compressing winner was the xz (archiv.tar.xz). Except of saving storage space it is necessary to take the compressing time into account. Usually it means that the more of space was saved, the more time it takes to create the compressed file.
In practice we can shorten the archiv.tar.gz to archiv.taz or archiv.tgz. In the case of archiv.tar.bz2 we can shorten to archiv.tb2, archiv.tbz, archiv.tbz2 or archiv.tz2. And archive archiv.tar.xz can be simplified to archiv.txz.
Just as for uncompressed archive, even for the compressed we can write down its content:
tar tfz ~/archiv.tar.gz
tar tfj ~/archiv.tar.bz2
tar tfJ ~/archiv.tar.xz
And we can also unpack the compressed archive. Contrary to uncompressed the unpacking of the compressed archive can be more or less slower.
tar xf ~/archiv.tar.gz --one-top-level=archiv-gzip
tar xf ~/archiv.tar.bz2 --one-top-level=archiv-bzip2
tar xf ~/archiv.tar.xz --one-top-level=archiv-xz
Let’s compress with ZIP, RAR and 7-Zip
Very commonly used way of compressing is ZIP and in its shadows quite popular RAR and 7z. These three formats are created, displayed and unpacked with tools that are not preinstalled. To use them, we need to install them first:
sudo apt install zip rar p7zip-full
The system will ask, whether you want to install them:
Do you want to continue? [Y/n]
Press the key y if you want to start the update process or press n key if you do not want to install them. Then press Enter.
Compress the directory archiv to the ZIP, RAR and 7z archives:
zip -r ~/archiv.zip ~/archiv
rar a ~/archiv.rar ~/archiv
7z a ~/archiv.7z ~/archiv
Display the content of the compressed archives:
unzip -l ~/archiv.zip
rar l ~/archiv.rar
7z l ~/archiv.7z
We have discovered that the whole directory structure along with the files are present in the archives, and we can now compare, which compressing format saves more space:
du -s ~/archiv.7z && du -s ~/archiv.rar && du -s ~/archiv.zip
The format 7z is the winner, followed by RAR and lastly ZIP.
Now we unpack the compressed archives:
unzip ~/archiv.zip -d ~/archiv-zip
rar x ~/archiv.rar ~/archiv-rar/
7z x ~/archiv.7z -oarchiv-7z
Summary
We have shown, how to pack a directory structure in Linux to a single archive via GNU TAR in version 1.30. We have also compressed archives with tools gzip, bzip2 and xz. We have also gained the knowledge of how to compress with tools ZIP, RAR and 7Zip.