If you have subscribed to Business Mail for 60 days free trial period and the service does not suit you, it is possible to migrate to an email service provided within Hosting. Your Business Mail inboxes will be automatically migrated under the Hosting service you choose. To migrate, please follow the steps below.
When migrating to hosted email, all email accounts that are currently in Business Mail are migrated. It is not possible to select only certain mailboxes. The Business Mail service will be deleted after the migration. You can individually delete unnecessary email boxes after migration under the hosting service.
In order for the migration to take place, the following must be ensured:
- Migration can only be performed under the same account as the Business Mail service (it is not possible to migrate the service to another account)
- this account must contain an active hosting service with an associated domain on which the Business Mail service is running (the service cannot be transferred to another domain under the same account)
Features supported on Business Mail and not supported on Hosting emails.
The following features will not be available after migration:
- documents that were part of the Documents Online Business Mail service will no longer be available
- scheduled videoconferences and conference recordings
- notes
- tasks
- TeamChat rooms and all conversations
1. Export contacts and calendars from the Business Mail interface
If you have decided to migrate from Business Mail to hosted mail, the very first step should be to back up your contacts and calendars.
For each mailbox, you need to export from the Business Mail interface on Webmail and import it into the Roundcube interface when you are done.
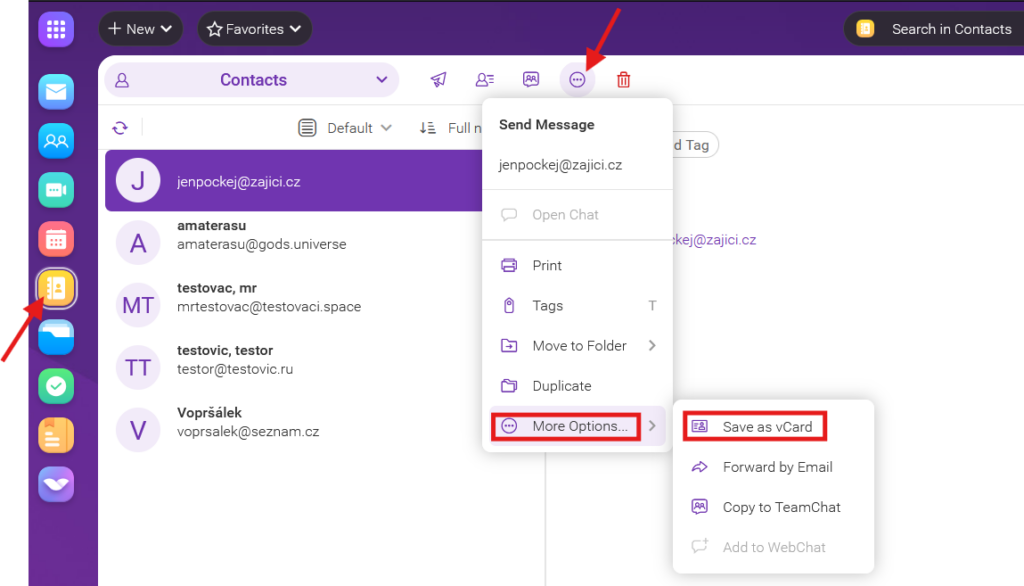
Export contacts
- Log in to your email account in the Business Mail interface from which you want to export contacts
- Click on the Contacts icon in the left menu
- Then click the 3 dots in top panel > More options… > Save as vCard
- Select the destination folder on your computer and confirm
- A file in .vcf format will be downloaded to your PC, which you can save.
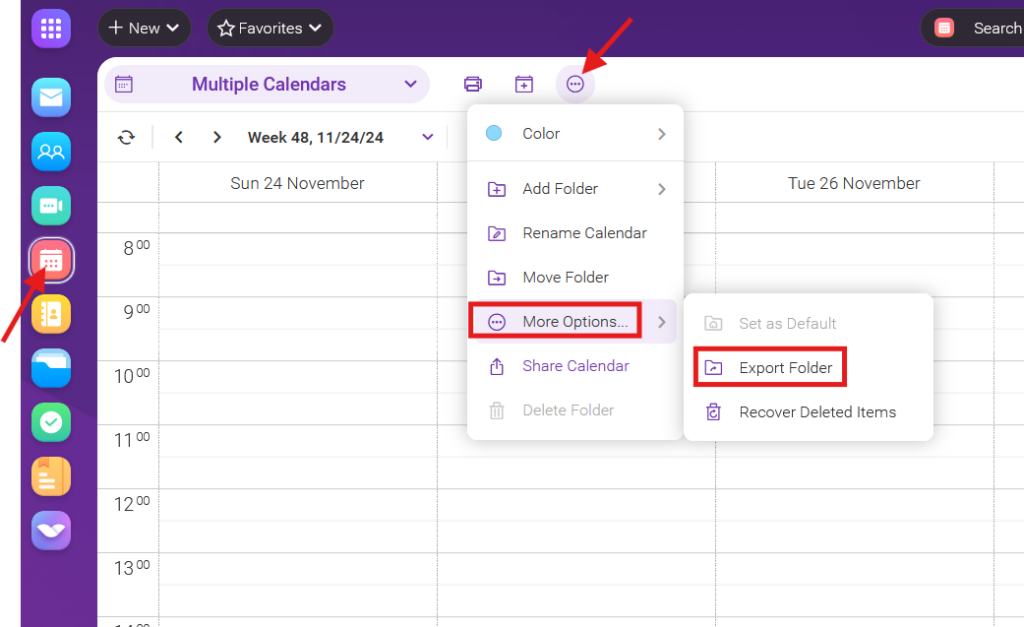
Export calendar
- Log in to your email account in the Business Mail interface from which you want to export contacts
- Click on the Calendar icon in the left menu
- Then select the calendar in Multiple Calendars
- Select 3 dots in top panel > More options… > Export Folder
- Select the destination folder on your computer and confirm
- You will download an .ics file to your PC and save it
2. Migration process
Once you have a hosting service under your account, a domain with Business Mail linked to that hosting, backed up contacts and calendars, you’re ready to migrate.
You don’t have to worry about emails that come in during the migration. You won’t lose any emails, everything is properly synchronized when you first log into the new service interface.
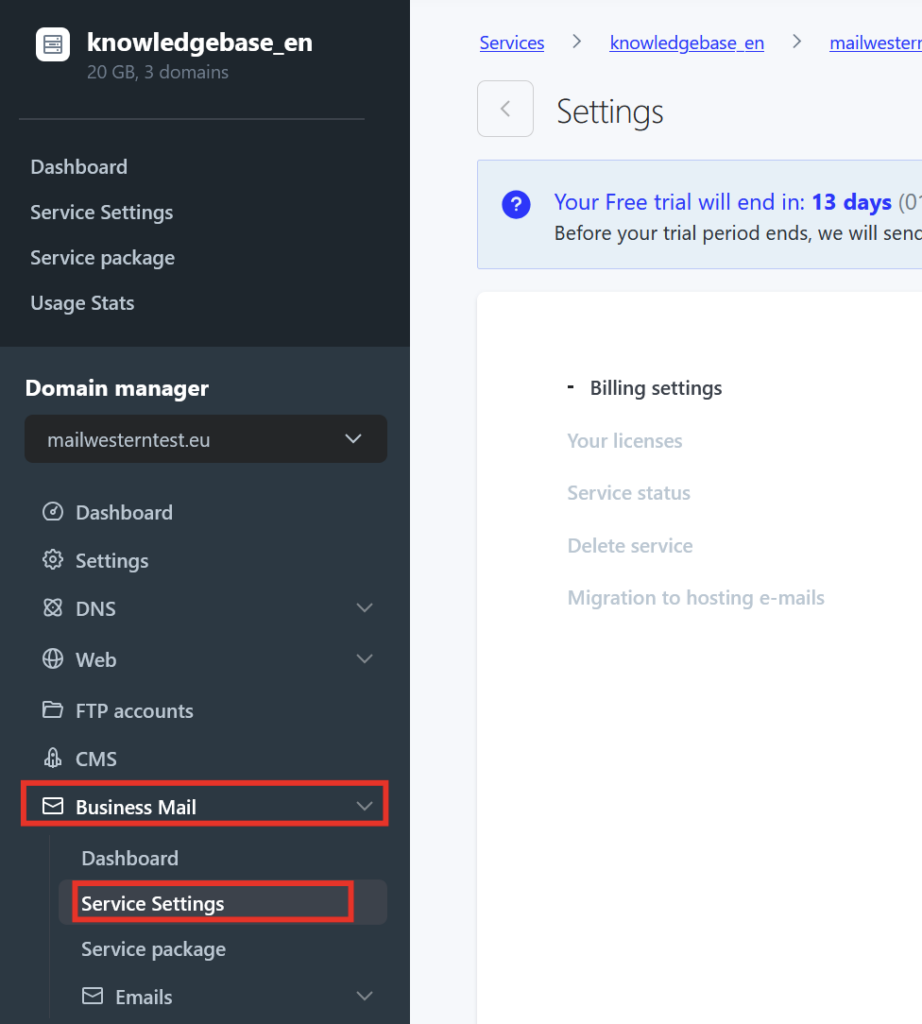
1. You can start the migration in our WebAdmin.
2. Open Business Mail and select Service Settings from the left menu
3. At the bottom of the screen you will find the “Migrate” button. When you click this button, you will be prompted to enter the domain of which email boxes to migrate as a security feature to start the migration.
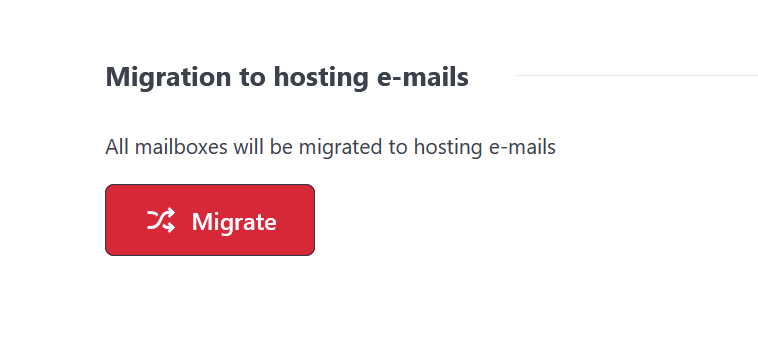
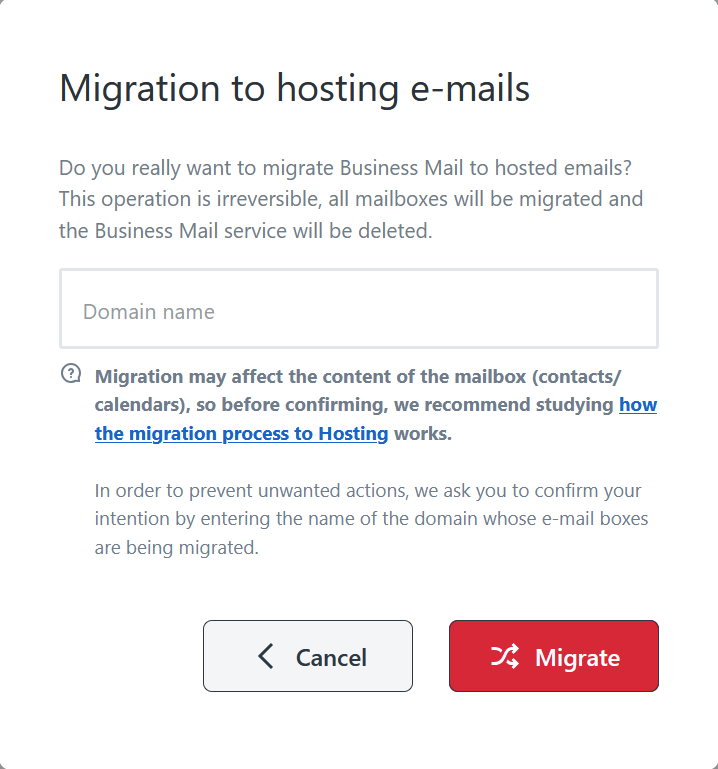
4. When you click Migrate, the automatic migration of mailboxes begins. When it is complete, you will receive an email notification confirming that the migration was successful.
The passwords for the email boxes remain unchanged. You will log in to the new interface with the same credentials as the standard WebMail login.
3. Import contacts and calendars into Roundcube
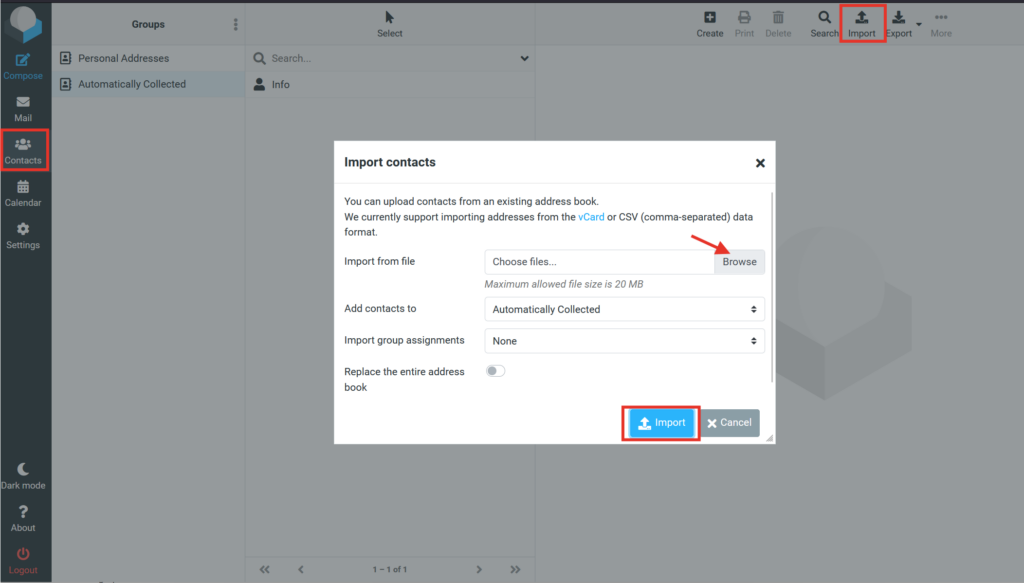
Import contacts
- Log in to the email account in the Roundcube interface via Webmail where you want to import your contacts
- Click on the Contacts button in the left menu
- In the top bar on the right, click the Import icon
- Select the .vcf file you want to import from your computer and confirm
Your contacts have been imported and you will see them in the Contacts folder
Import calendar
- Log in to the email account in the Roundcube interface via Webmail where you want to import your contacts
- If you have exported multiple calendars, you need to create them in the new interface first:
- Click on the Calendars button in the left menu
- Click the Add Calendar icon in the top menu and create as many calendars as you have exported
- Click on the Calendars button in the left menu
- In the top bar on the right, click the Import arrow
- Select the .ics file you want to import from your computer and confirm

