Company Websupport offers the Samba/SMB share for network backup of operating system Microsoft Windows Server. For the backup itself you can use any tool, that supports Samba/SMB share.
Backup is possible to configure for all products of Websupport company with operating system Microsoft Windows Server:
- Dedicated server
- Virtual private server (VPS)
- Virtual data center (VDC)
Microsoft company offers the utility of Windows Server Backup, that has the base functionality to create one-time and planned backups and their restoration. This guide describes the use of this tool with the storage space from Websupport.
Warning
Note: Please pay increased attention to the following information.
- Websupport company does not answer for the state of data created by any tool.
- Samba/SMB share is available only from the server, that is being backed up – meaning it cannot be connected to another server.
- Via Windows Server Backup utility do not create neither complete backups nor backups of system components, only for the specific directories.
- Planned (scheduled) backups require lowered Security Policy for password and adding local user with the same access details as the access to Samba/SMB share.
Note: This guide describes installation for Windows Server 2012 R2 Standard, but is applicable even to other versions and editions.
Installing Windows Server Backup utility
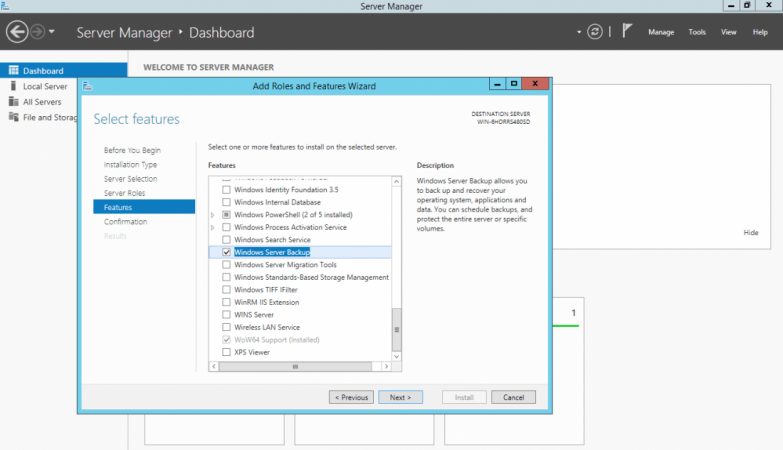
Via Server Manager on the server add an item Windows Server Backup in the Features.
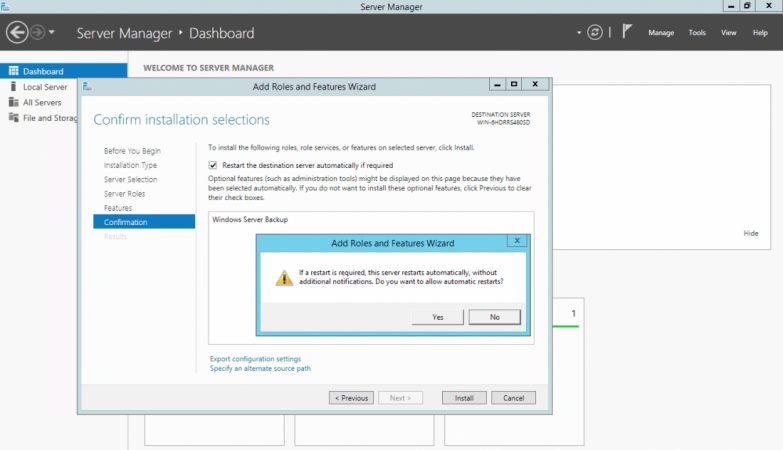
Installation can demand a restart of the operating system.
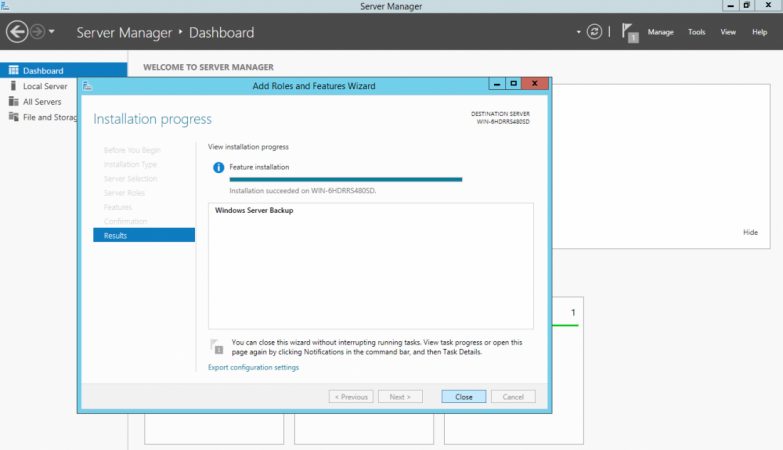
Successful completing of the installation.

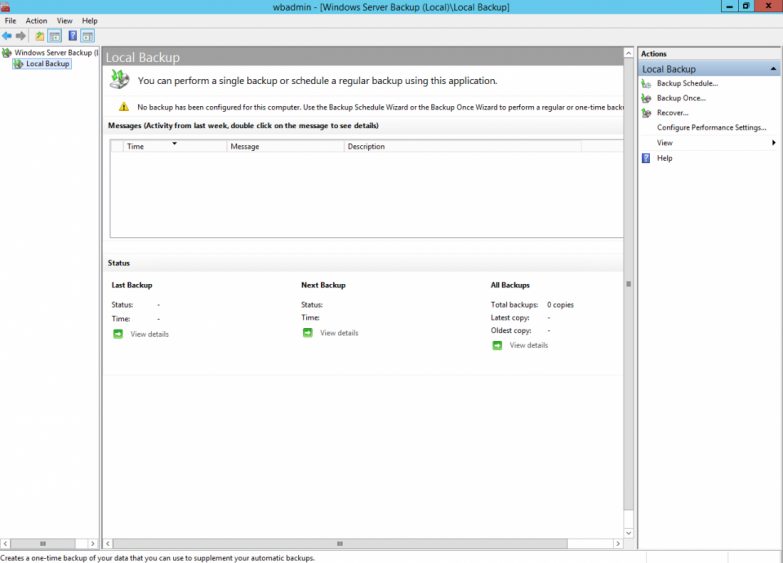
Running Windows Server Backup utility.
One-time backup
Run Windows Server Backup utility. From the right menu select Backup Once…
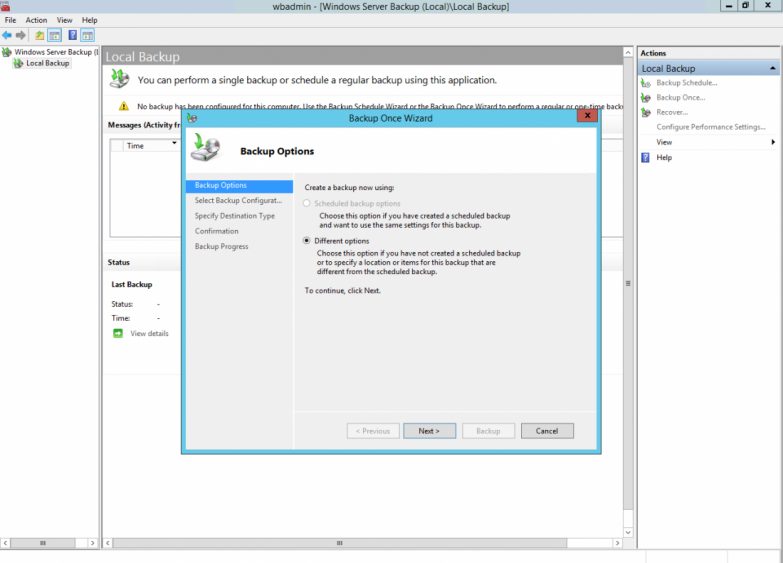
A guide for backup configuration starts

Select the files and directories for backup – select the Add Items option.
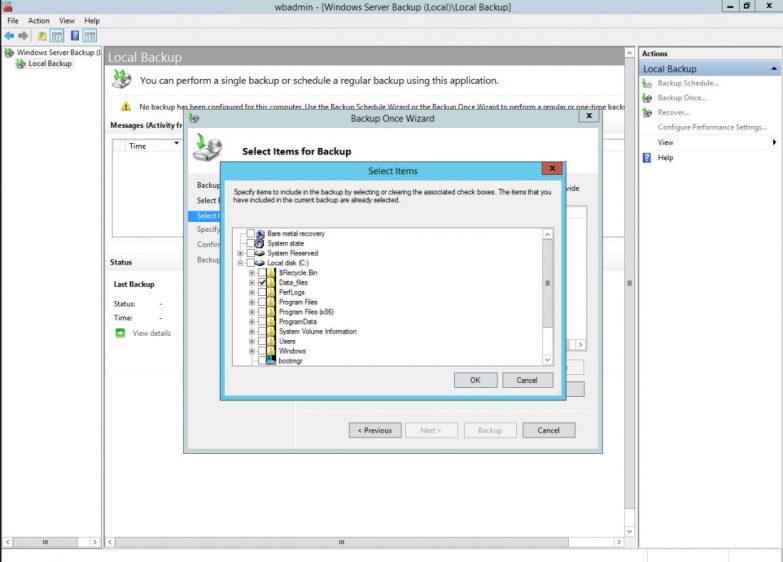
As an example set the directory Data_files even with the content of disc C:
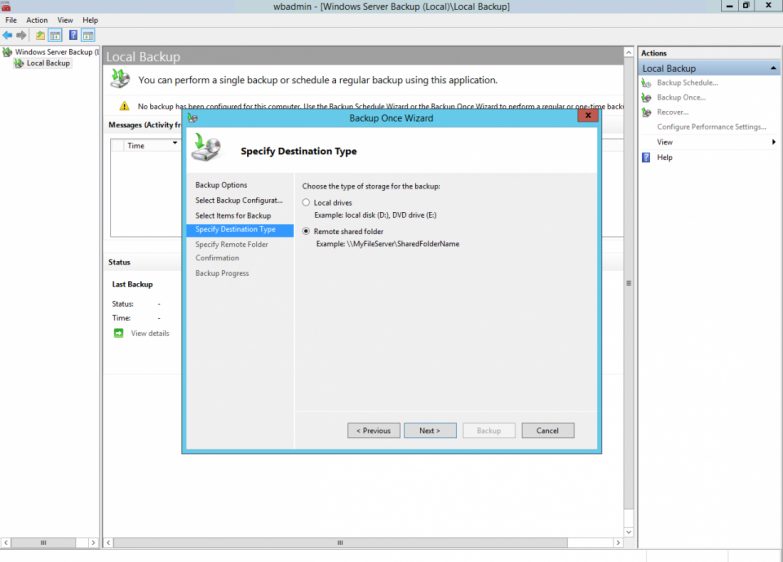
Select the space, where the backup will be stored – select Remote shared folder.
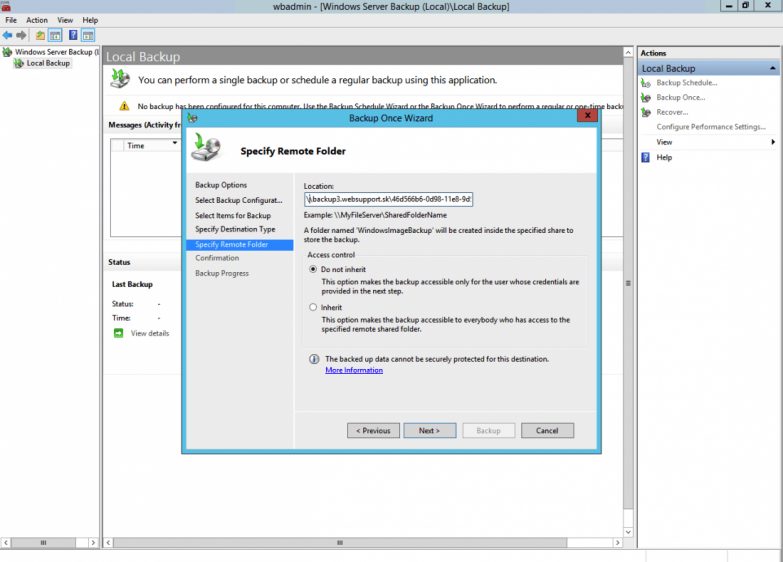
Set the remote server and directory in the form of \\server\directory as it was sent with the access details. Access control set as Do not inherit.

Enter the access details.
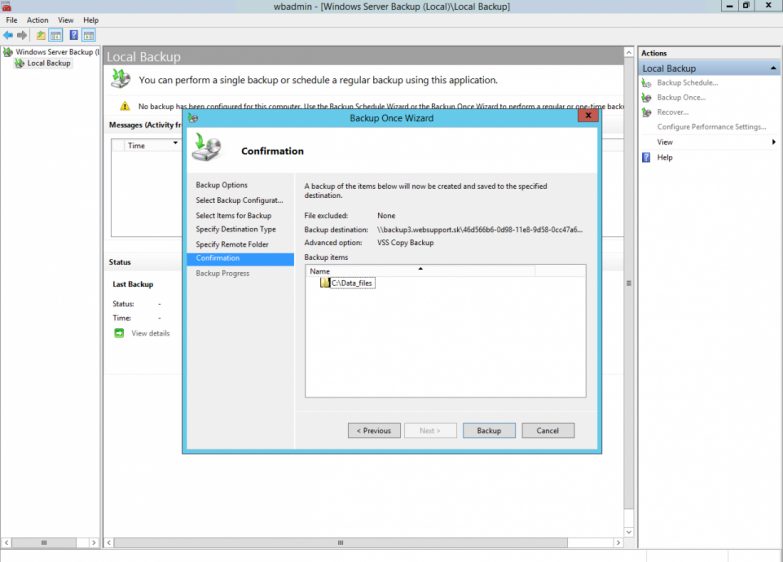
Summary of the backup information.

Backup is running.
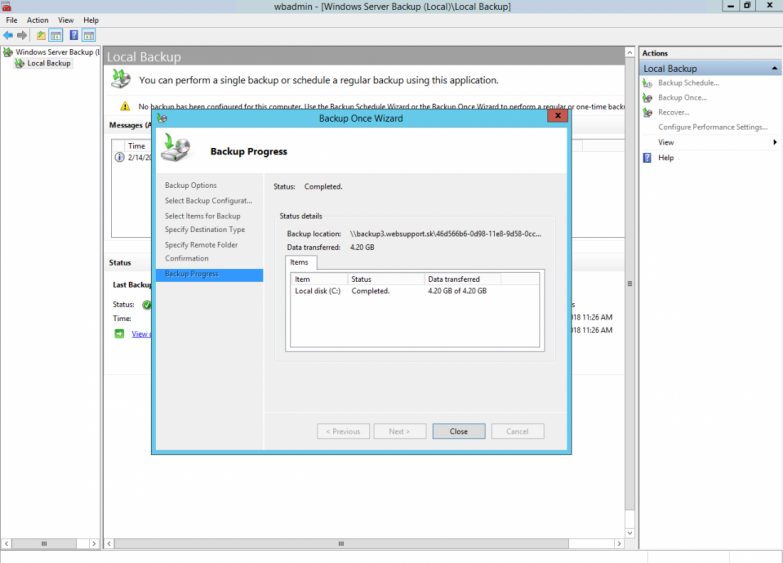
Backup is successfully completed.
Restoring from backup
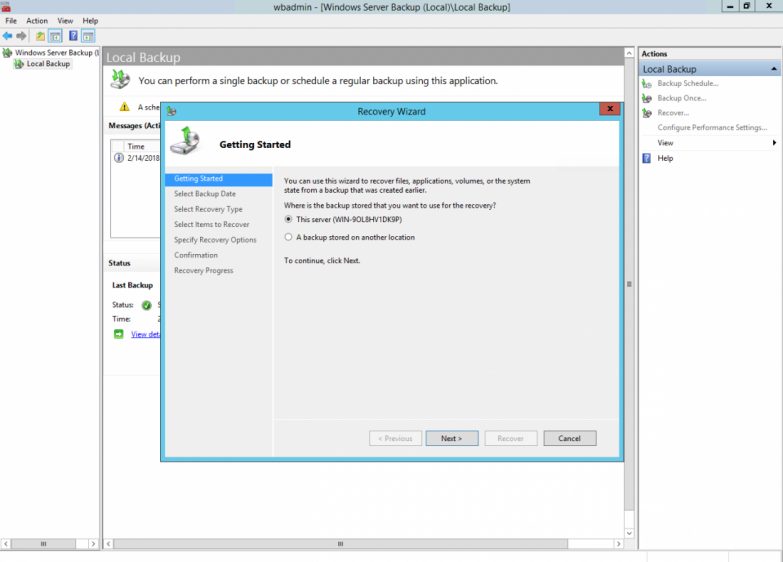
To run the restoration from backup, select Recover… from the right menu
Note: The same process is used for manual (one-time) and planned (scheduled) backups.
Select This server.
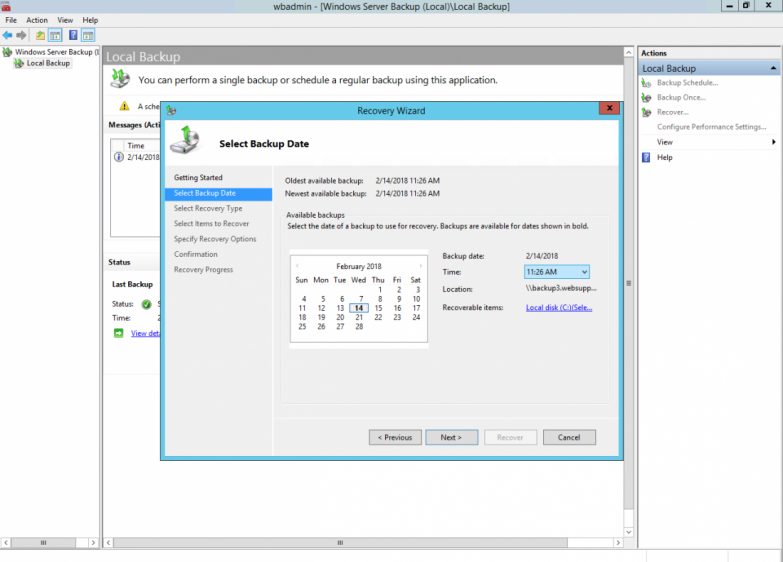
Select the date and time of the backup you want to restore.
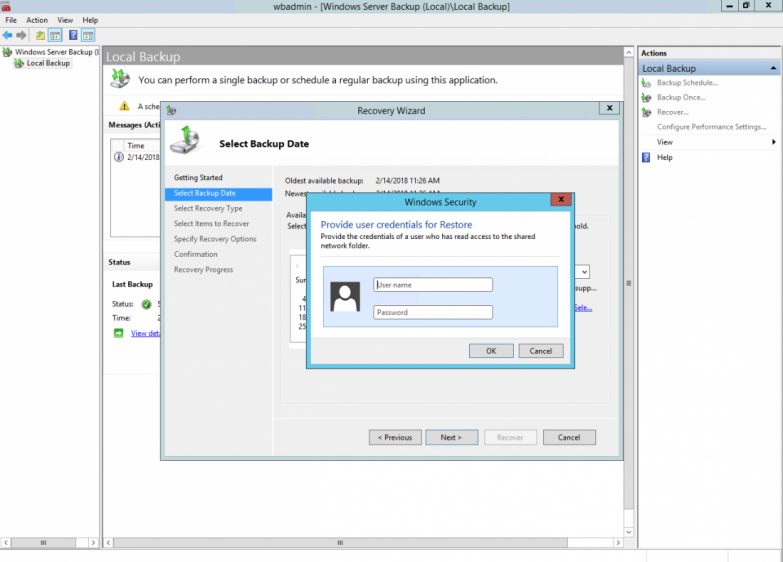
Enter access details
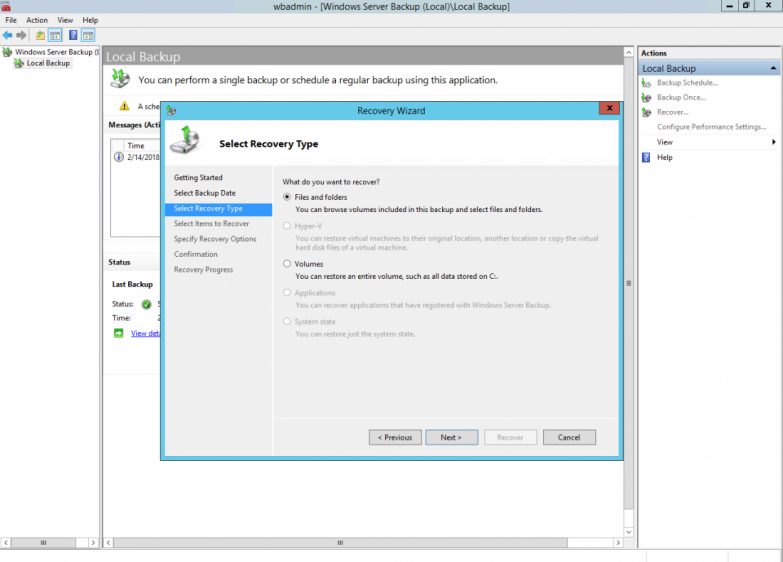
Select Files nad folders.
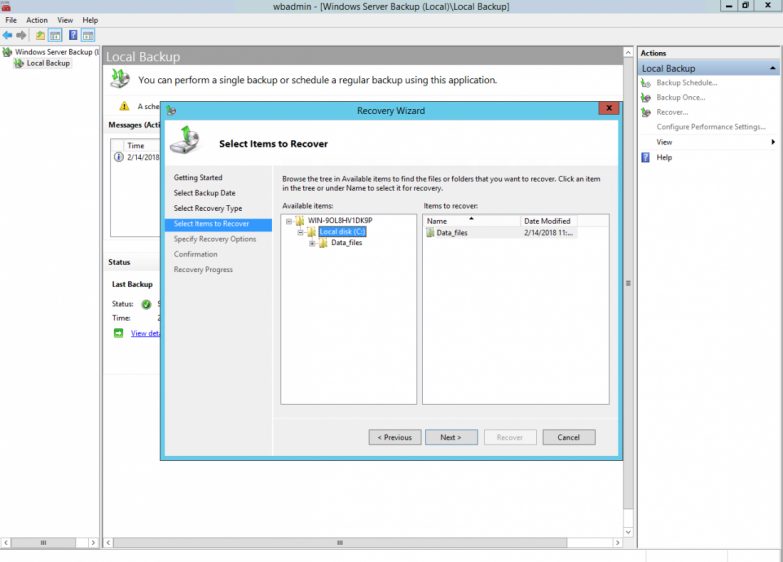
Select what data you want to restore.
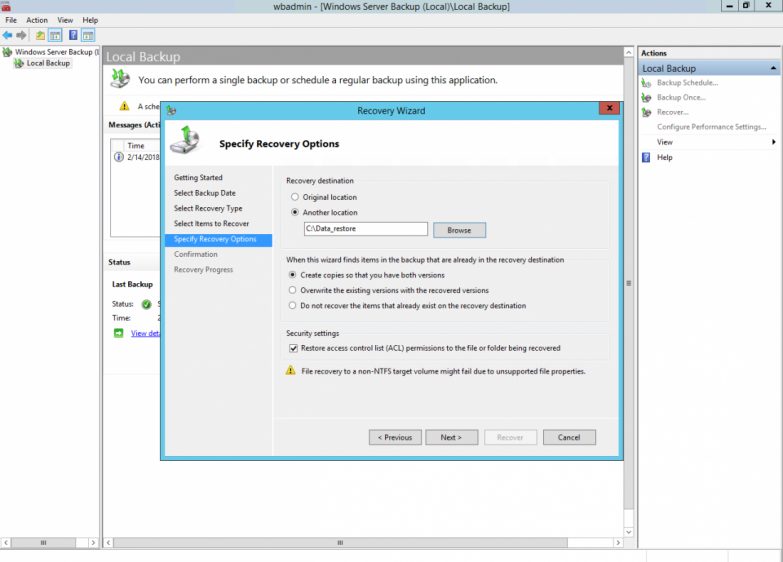
Select where do you want to recover the data, if on the original destination or select a new one. In our example it will be the directory Data_restore on the disc C:
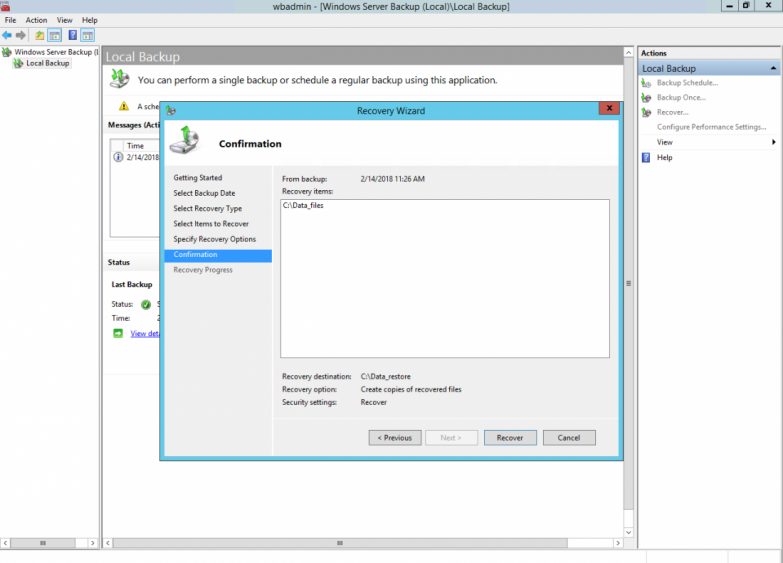
Summary of the information and where it will be restored.
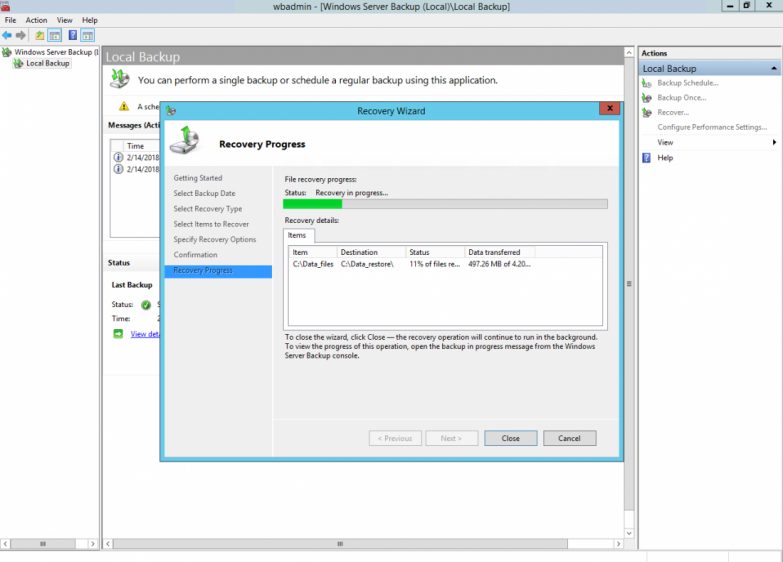
A restoration from backup is running.
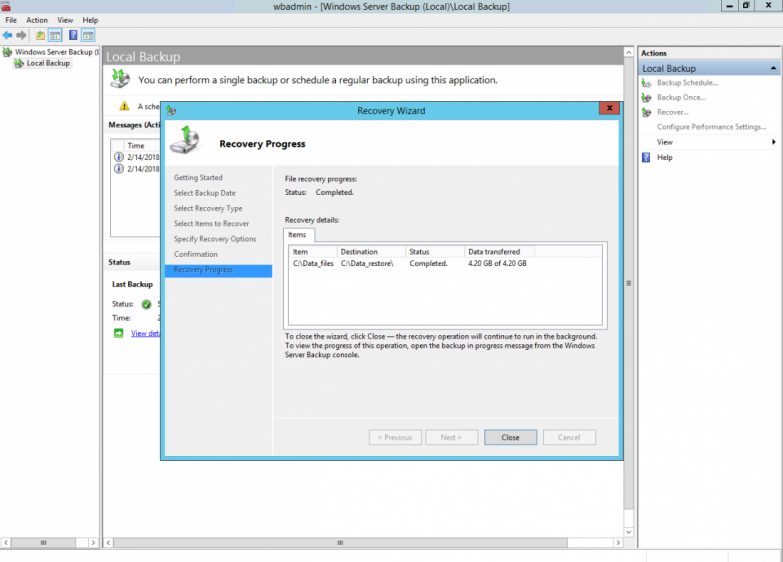
Restoration completed.
Scheduled automatic backup
Planned (scheduled) backup requires reduced Security Policy for password and adding local user with the same access details as for Samba/SMB share.
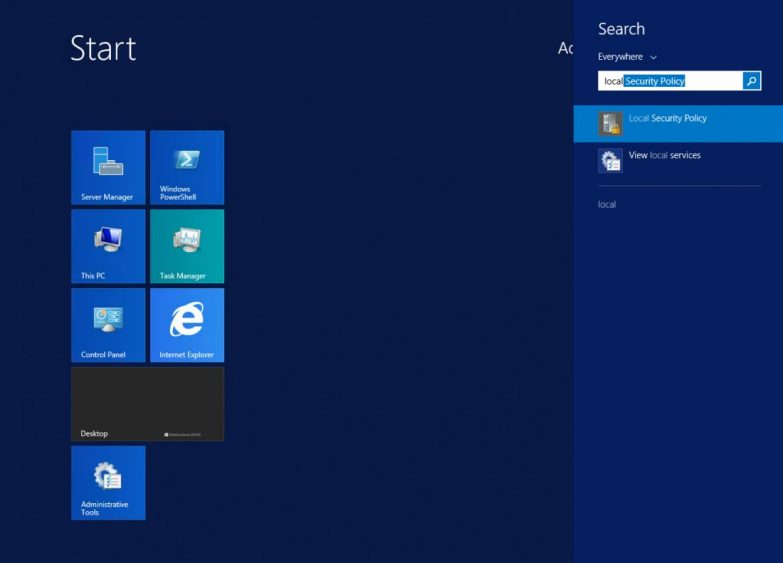
Run the Local Security Policy
Warning: This change will allow this user to use the reduced password policy for users
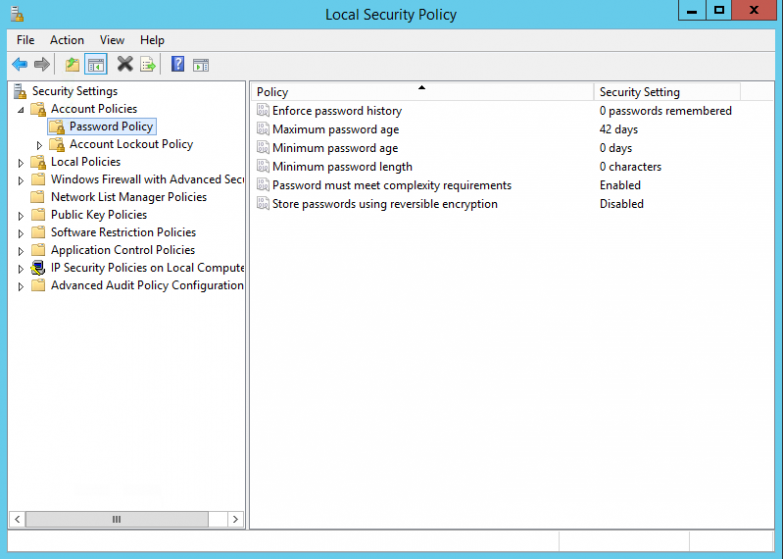
Go to Security Settings – Account Policies – Password Policy.
Double click on the Password must meet complexity requirements.
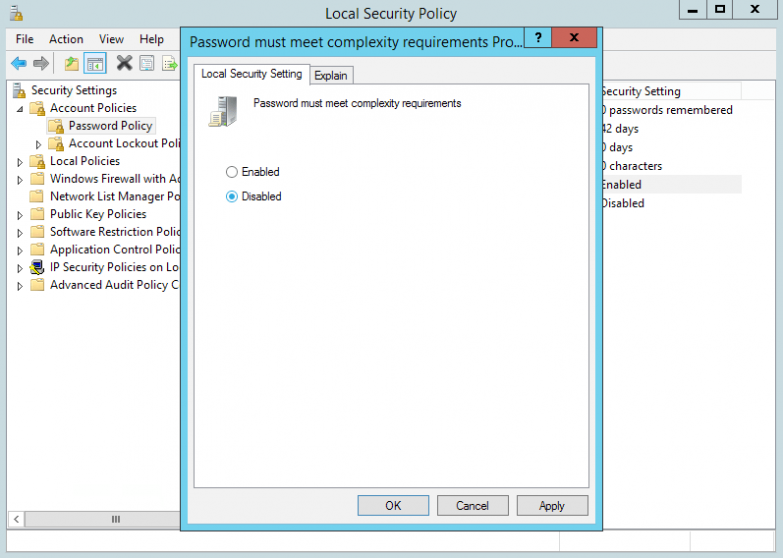
Set Disabled.

Run the Computer Managament.
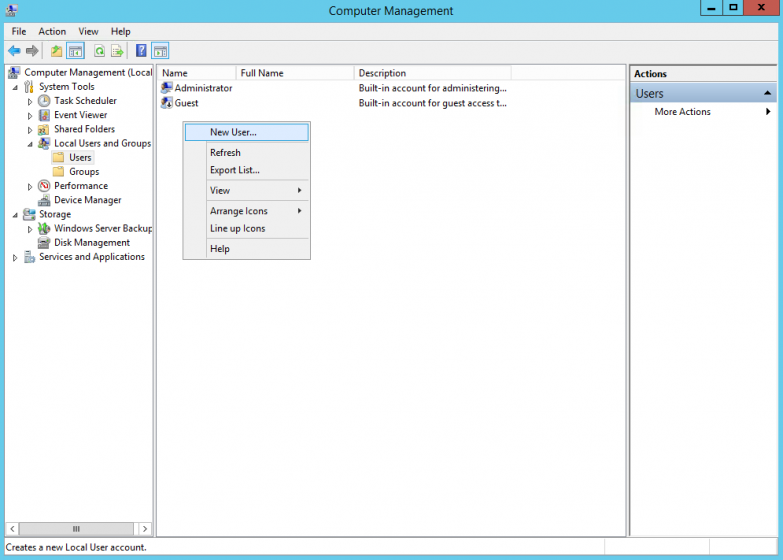
Go to Computer Managament – Local Users and Gropus – Users.
Right click and select New User…
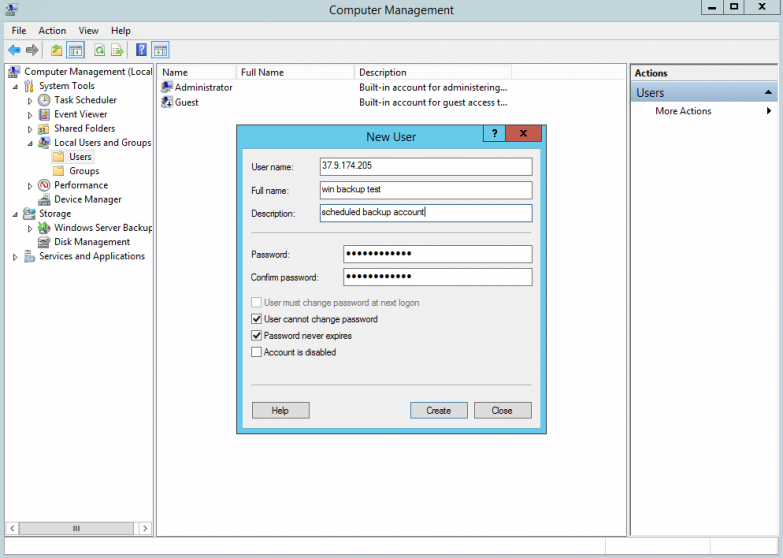
Create the new user with the with the same username and password as used with Samba/SMB share. User name and Password have to match.
Set the rights as shown in the picture.
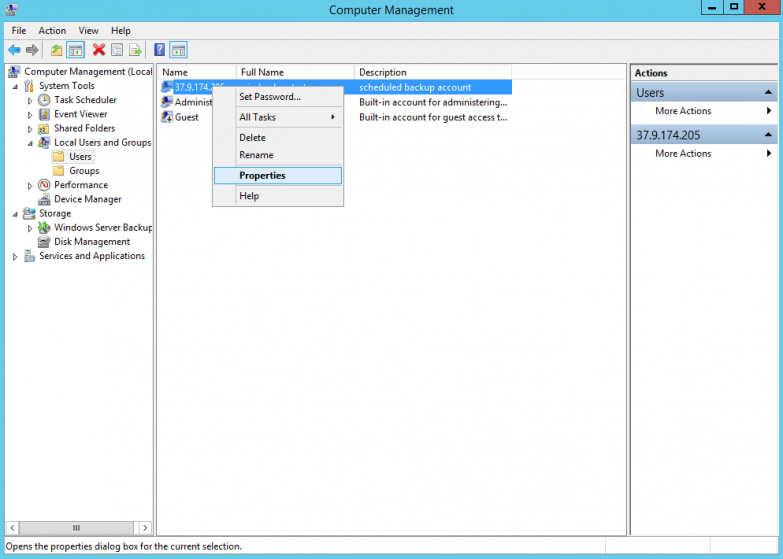
Right click on the new user, select Properties.
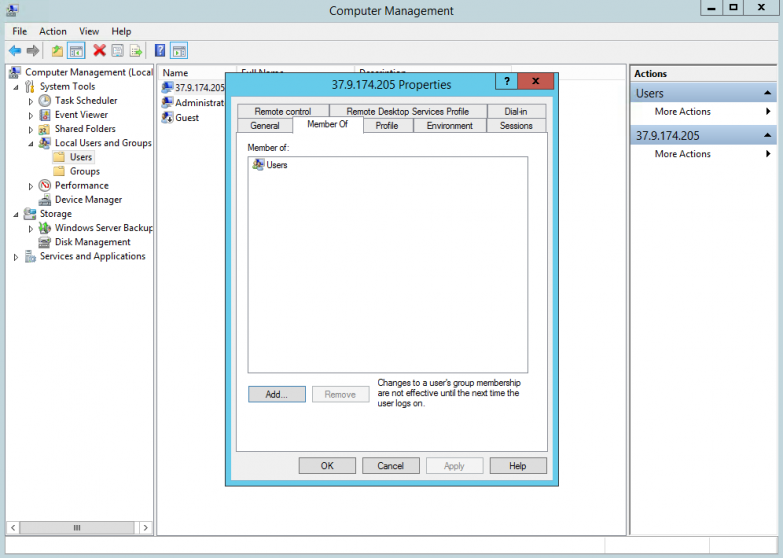
Switch to the tab Member Of.
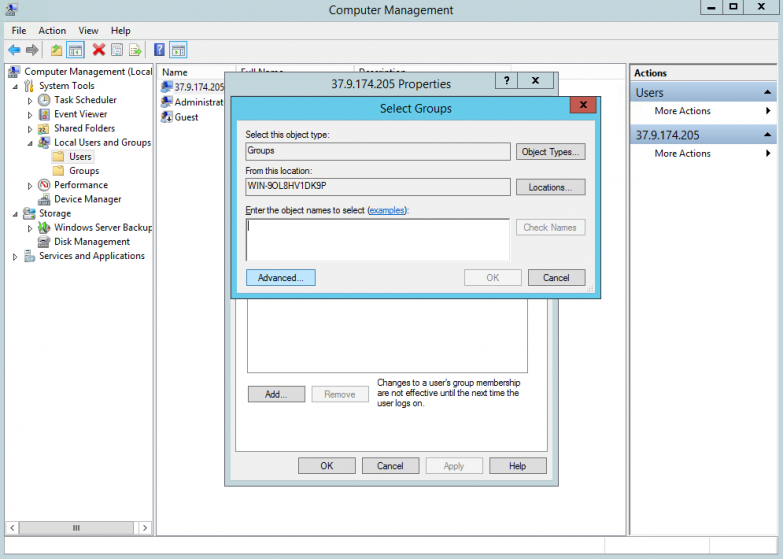
Select Advanced.
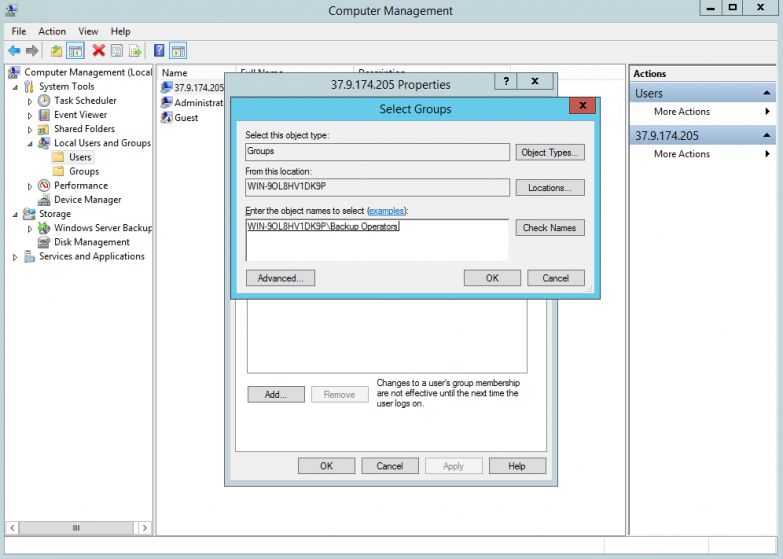
Select Backup Operators.
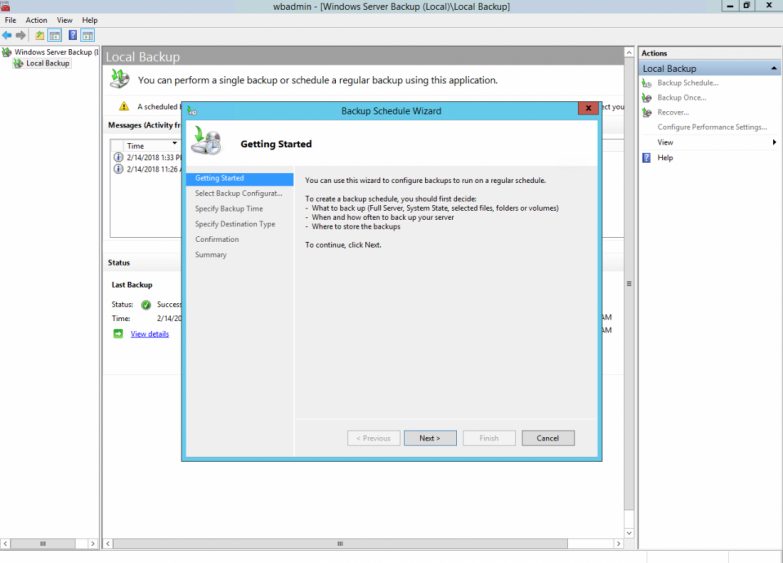
Run the Windows Server Backup utility. From the right menu select Backup Schedule…
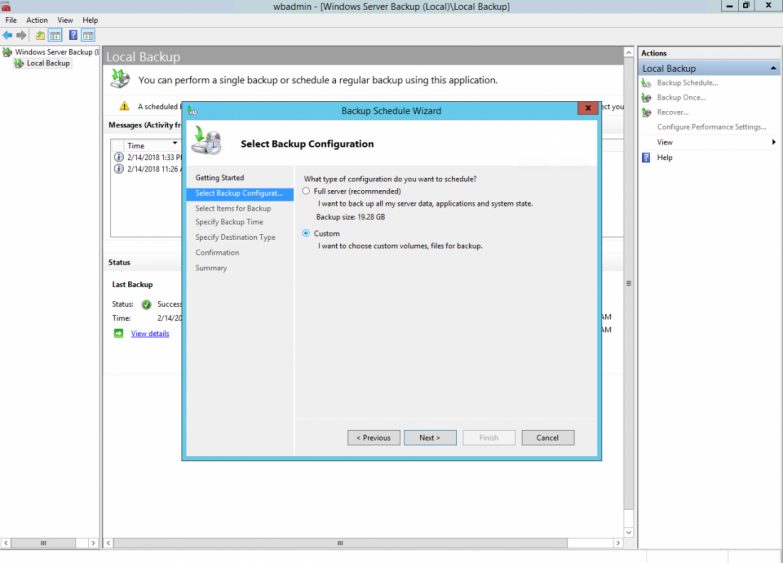
Select Custom.
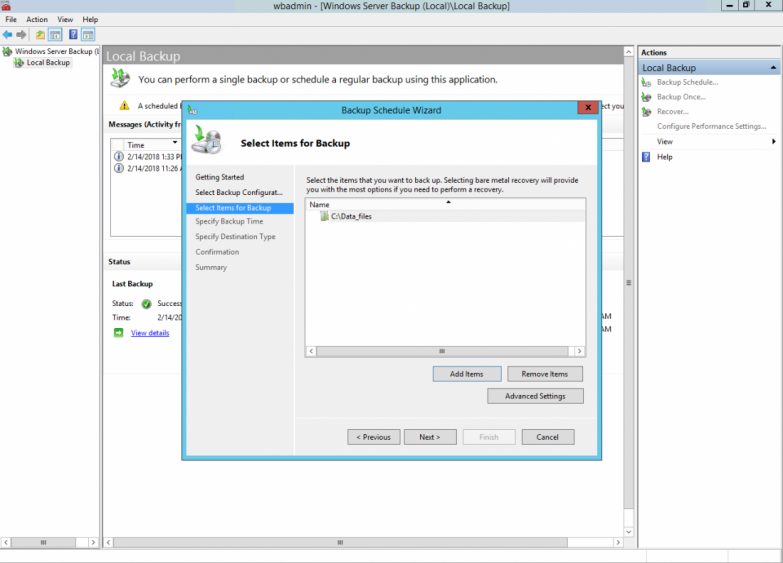
Select Add items and set the directories and file that you want to set for backup.
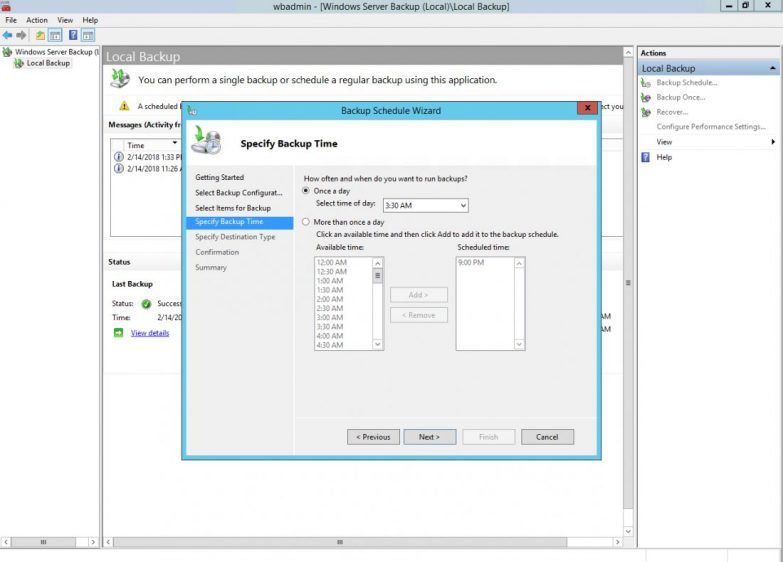
Set the time for backup – only once per 24 hours
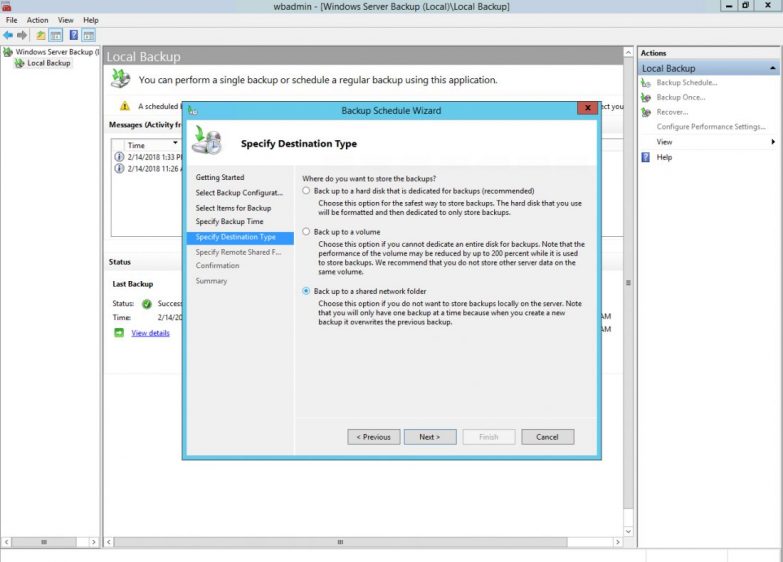
Select Back up to a shared network folder.
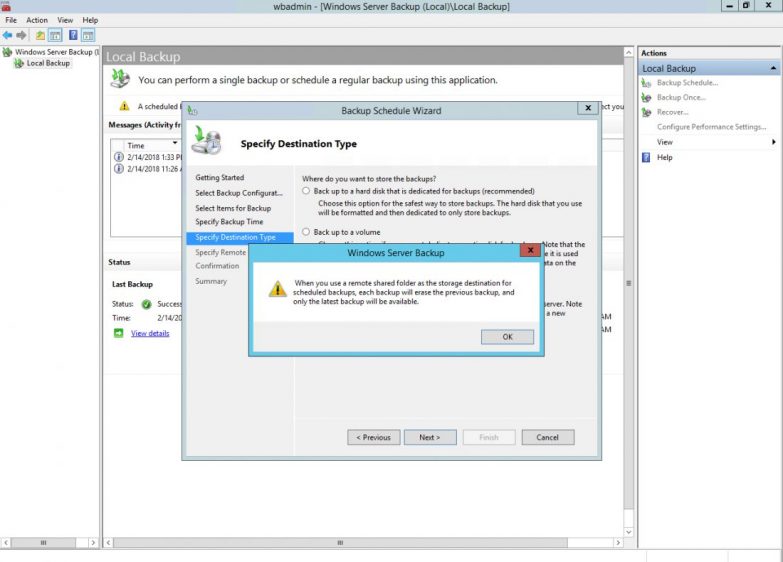
Warning: Only the last backup will be available. All previous will be deleted.
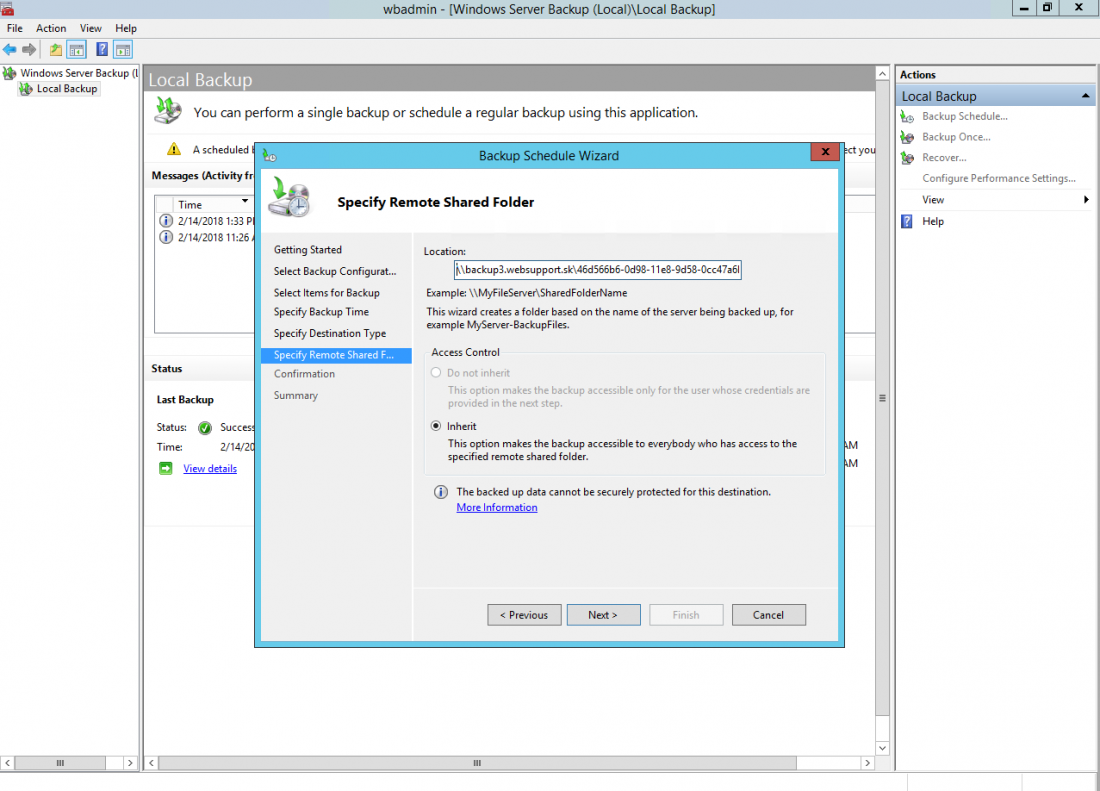
Set the remote server and directory in the form of \\server\directory as it was sent to you with the access details.
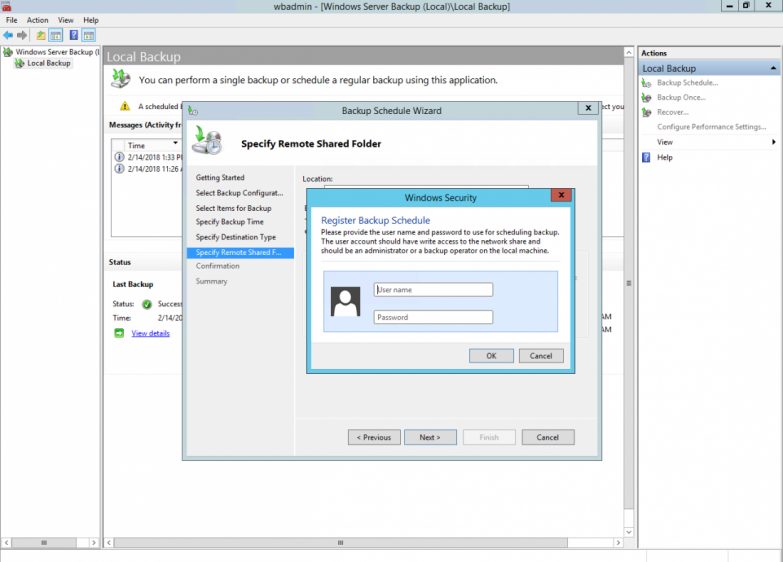
Enter access details.
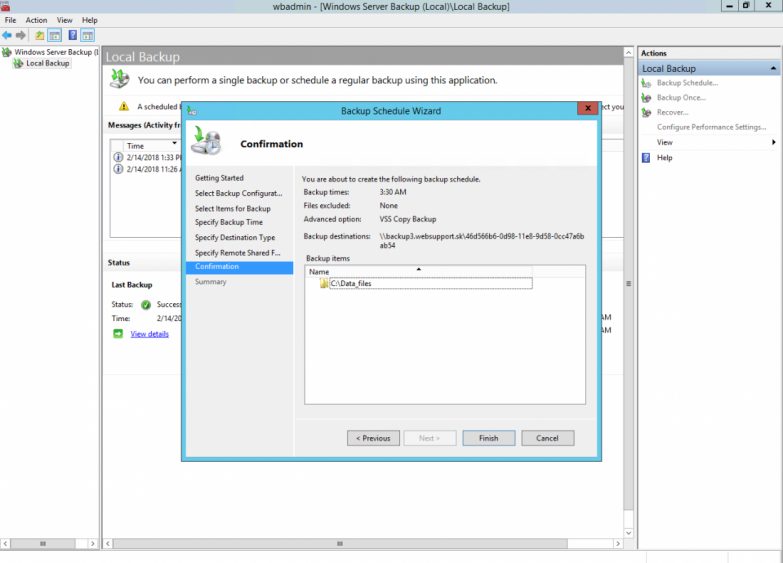
summary of the backup settings.
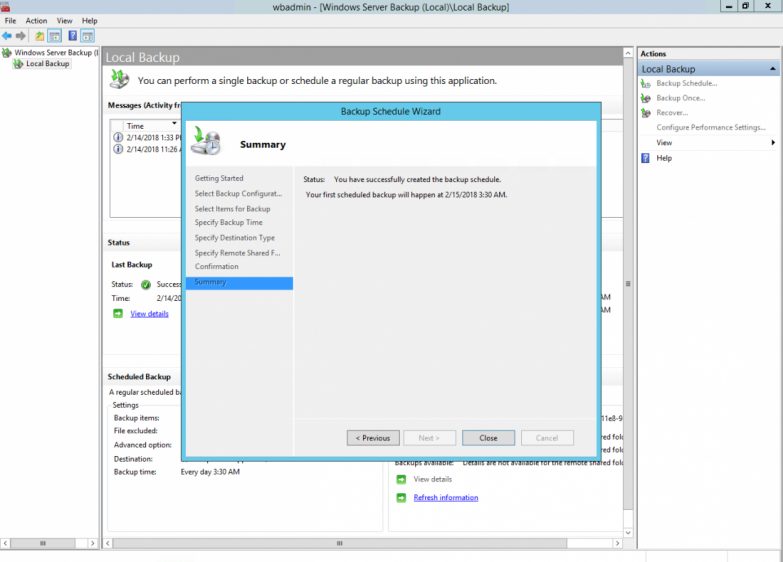
Backup is successfully set.