To manage email accounts on macOS devices (MacBook, iMac, …), you can use the Mail email client, which is Apple’s native email application.
Manual settings
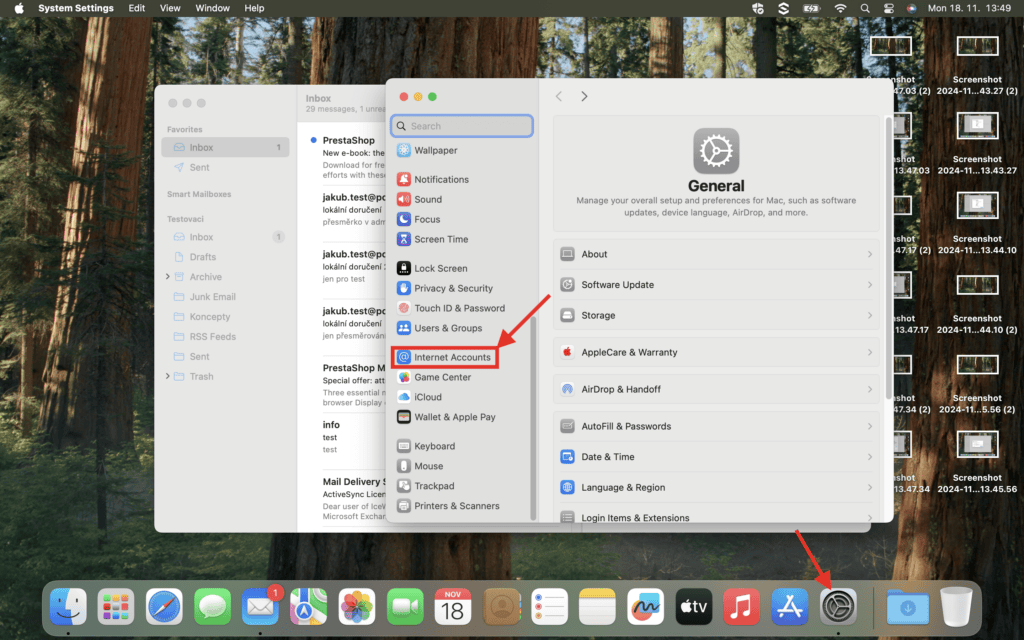
1. Select System settings from the bottom menu.
In the settings, go to the Internet Accounts section
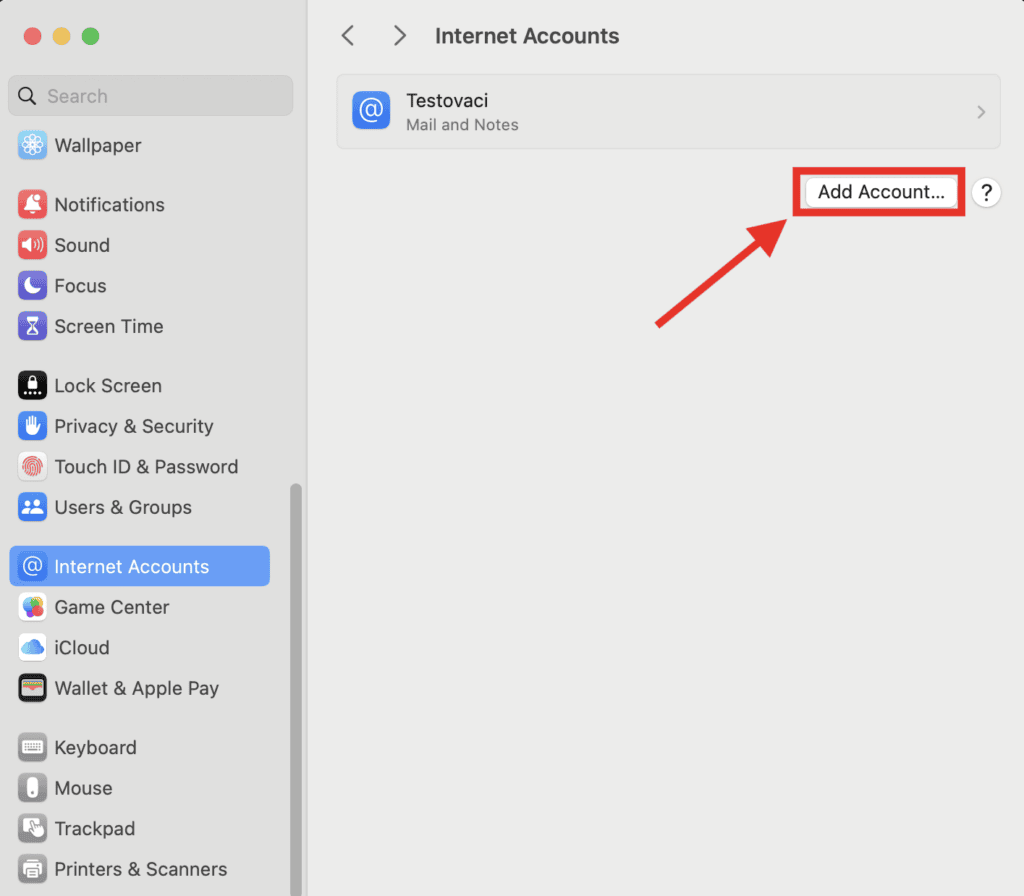
2. In the Internet Accounts section, add an account using the button Add Account…
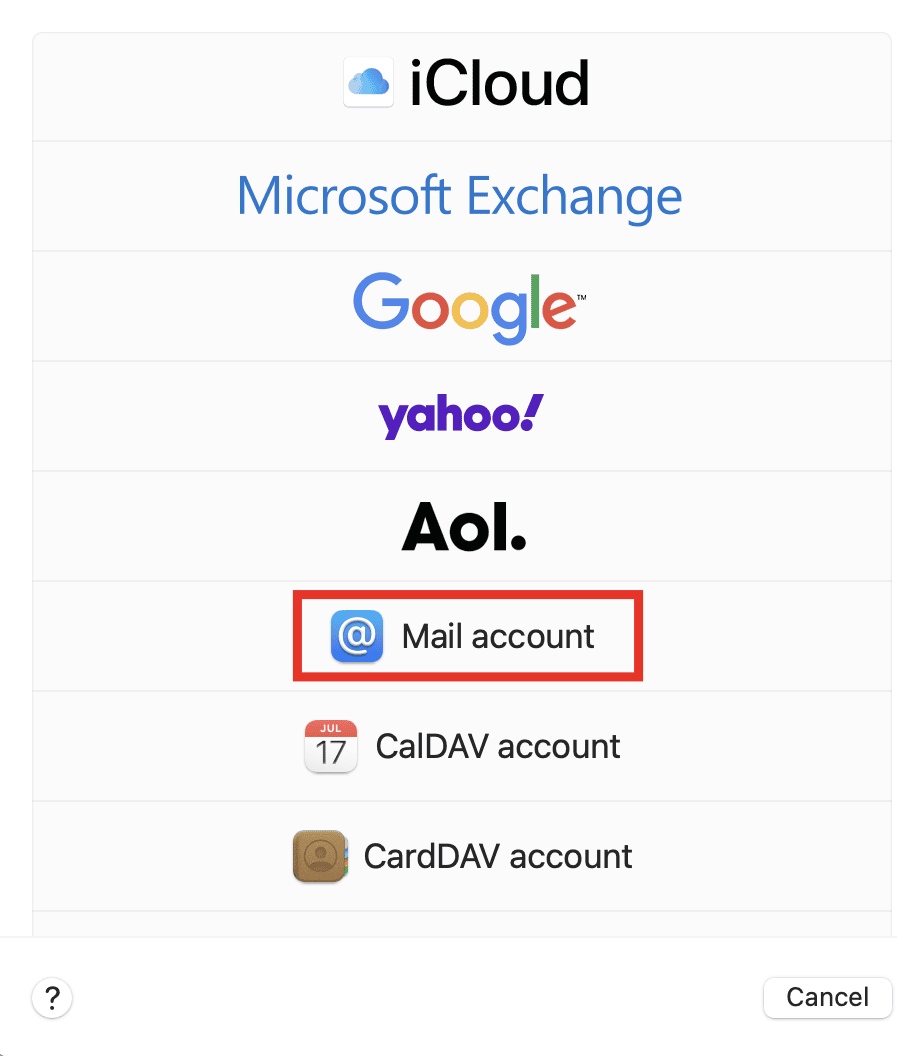
3. You will be presented with the option to select an account. Select Mail account.
4.
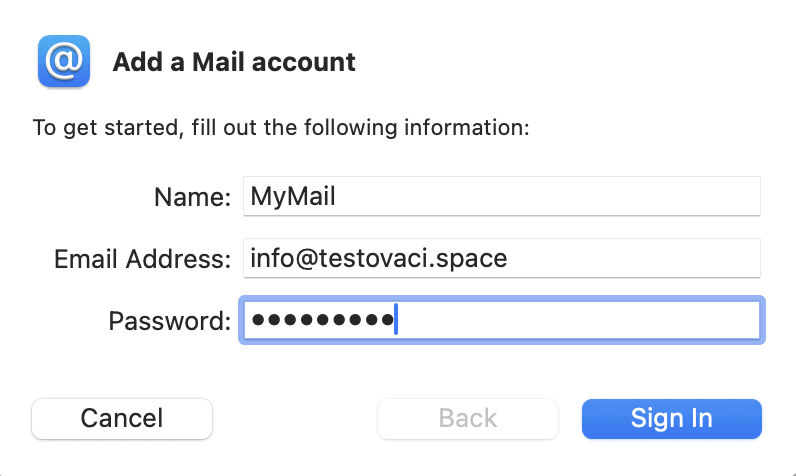
The basic email account settings are displayed. Fill in the name according to your preferences.
Next, fill in the email address and password for your email account.
Then click on sign in
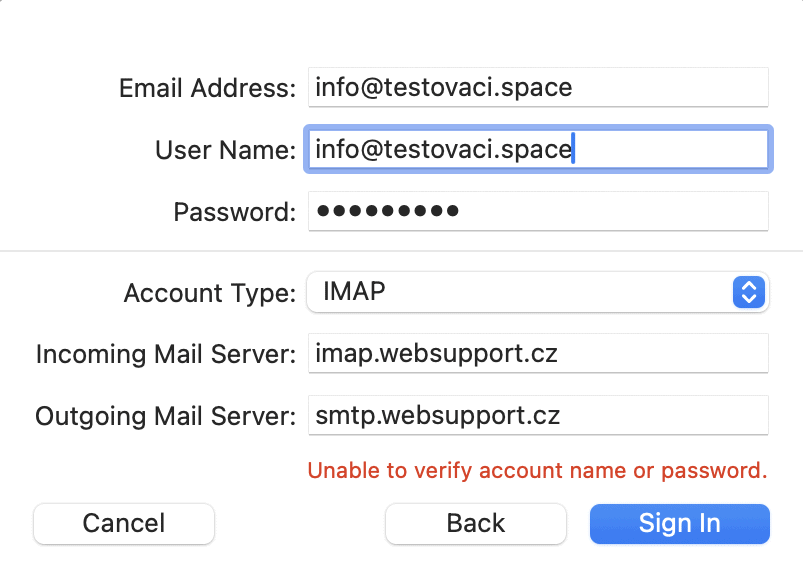
5. The email login will not go through automatically and you will get an error message and form with other settings.
Fill in the settings as shown below. Select IMAP (recommended) or POP as the account type. You can find the differences of account types described in this article.
Incoming mail server
for IMAP: imap.websupport.cz
for POP3: pop3.websupport.cz
Outgoing mail server
server: smtp.websupport.cz
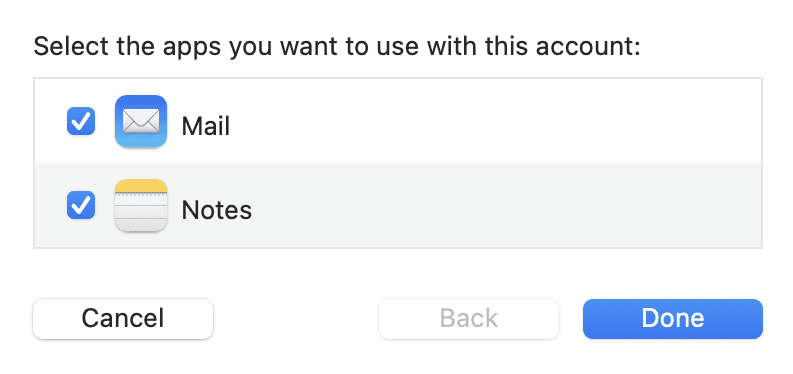
6. If set up correctly, you will see the option to synchronize individual elements. Select Mail (others are optional) and click on Done.
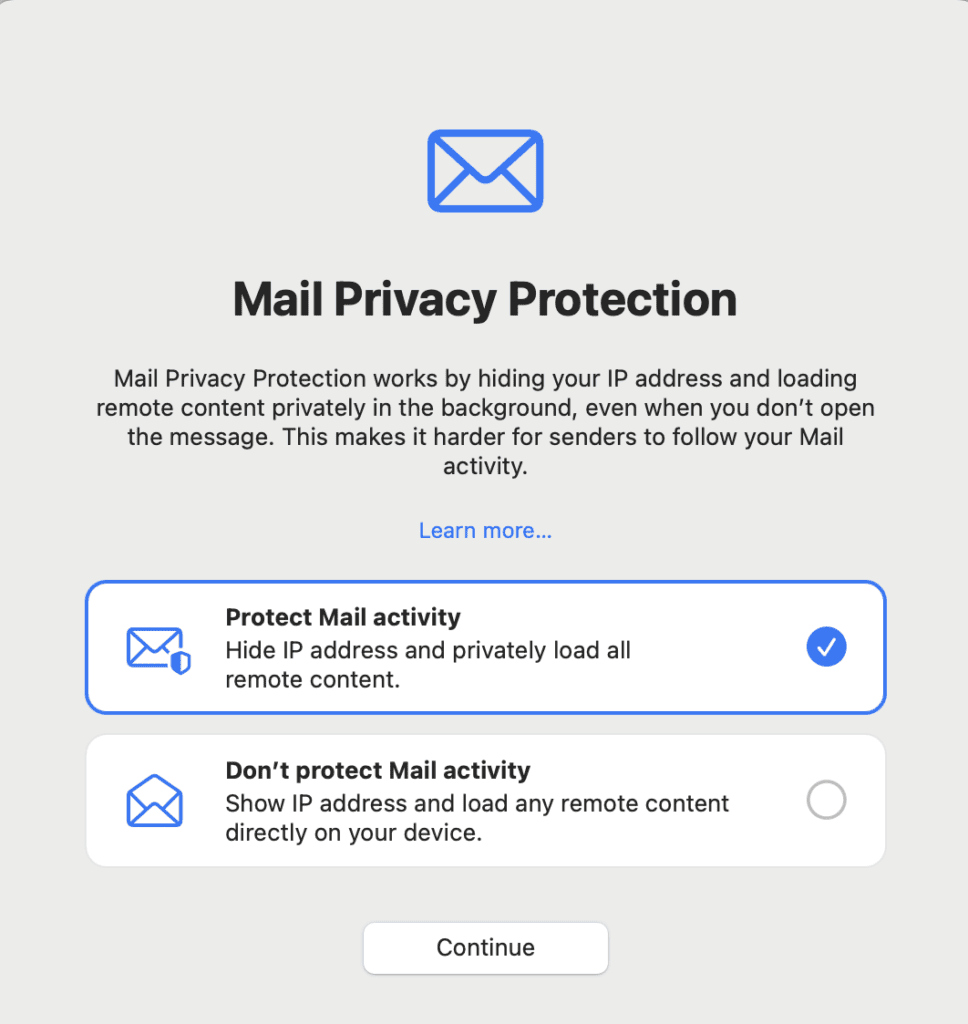
7. You will then see the option to access your emails securely. This is a macOS setting that does not affect email synchronization. Choose the option of your preference.
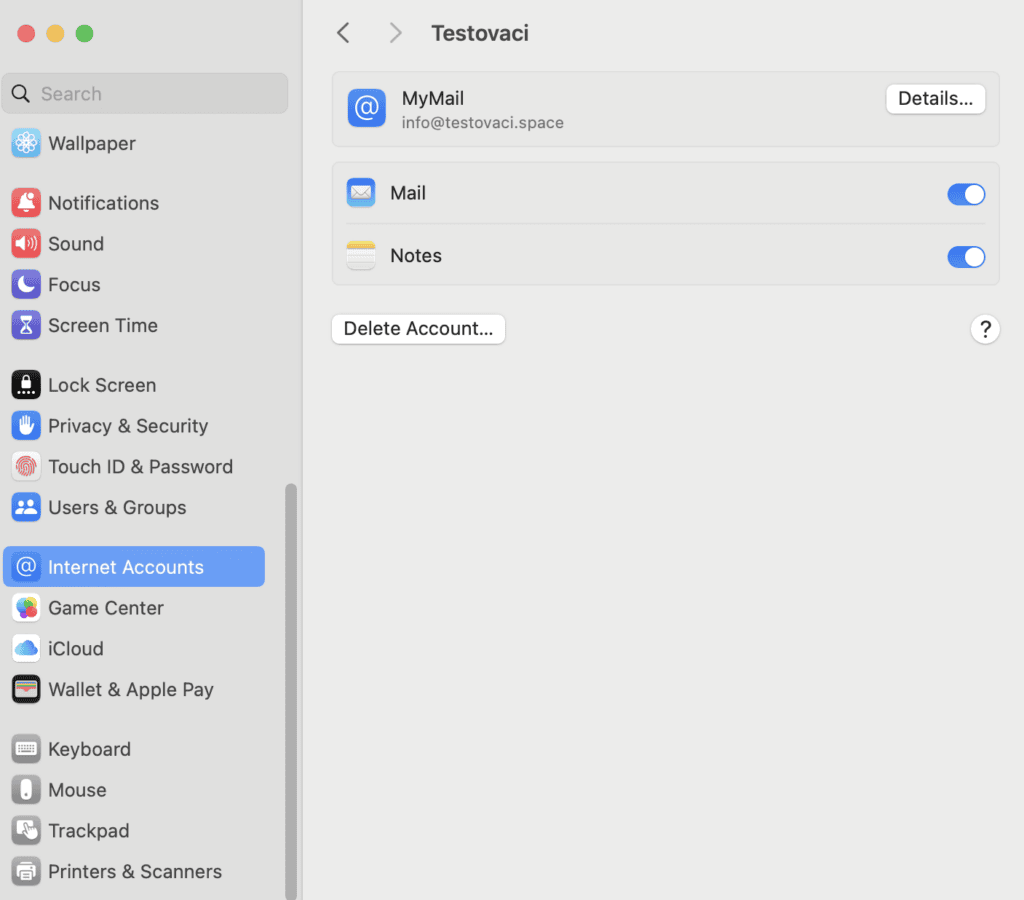
8. Selecting any option will take you back to the settings where you will see your email account added. At this point, you can go to Mail application, where you will see your emails loading one by one.
For larger mailbox contents, it can take up from minutes to tens of minutes for messages to fully synchronize.
If all steps are followed correctly, your account is successfully configured. Congratulations!
