If you need to change a database connected to CMS PrestaShop, the change will only take few minutes. Follow the steps bellow.
1. Log in to the FTP
- For login to FTP you can use FTP client like FileZilla or Total Commander or our web interface ftp.active24.cz.
2. Go to directory where the PrestaShop is installed.
- If you have PrestaShop installed at the domain domain.tld it is located in the “web” directory
- If you have PrestaShop on any of your subdomains (e.g. blog.yourdomain.tld), go to the sub directory and there locate your subdomain directory (e.g. /sub/blog)
3. Open directory config and search for file settings.inc.php and open it. We recommend to make a copy first, just in case.
4. Locate these lines of code:
define('_DB_NAME_', '4q7NJl8Zi44M');                          -------> Instead of "4q7NJl8Zi44M" enter new database name
define('_DB_SERVER_', 'mariadb101.websupport.sk:3312');       -------> Enter hostname of the database from administration
define('_DB_USER_', '4q7NJl8Zi44M');                          -------> Instead of "4q7NJl8Zi44M" enter new database user
define('_DB_PASSWD_', 'i5q9tzSm8aUT');                        -------> Instead of "i5q9tzSm8aUT" enter new password
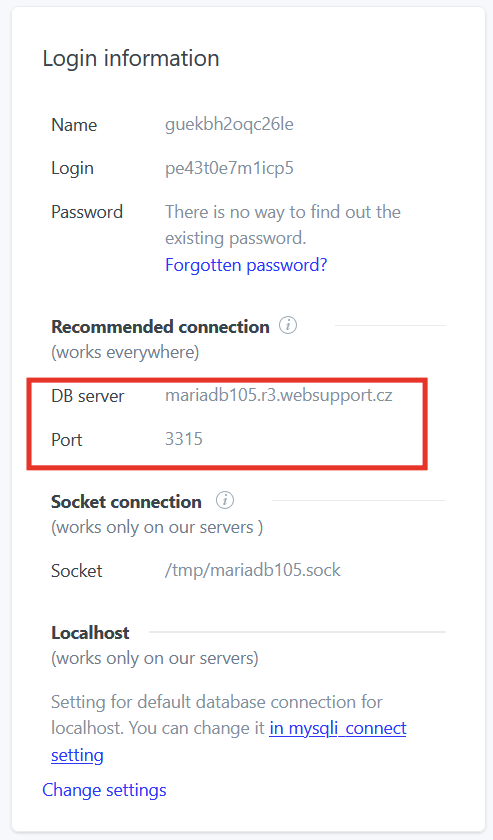
List of hostname (DB server) for each database can be found in the administration
- Select your domain in the Services tab
- Go to Databases section in the left menu
- Click on the name of your database in the list
You can see all login information in the left box: