Our tool for migrating e-mails will allow you to duplicate mailbox located in Active24 or elsewhere. All you need to do is to enter necessary details and select an existing or create a new e-mail account.
After the details are filled and migration is set, it will be placed in the requests and it will be processed. Processing request may take several minutes or few hours based on the current load and size of your mailbox. You can watch the progress in the migration list (page requires refresh to update).
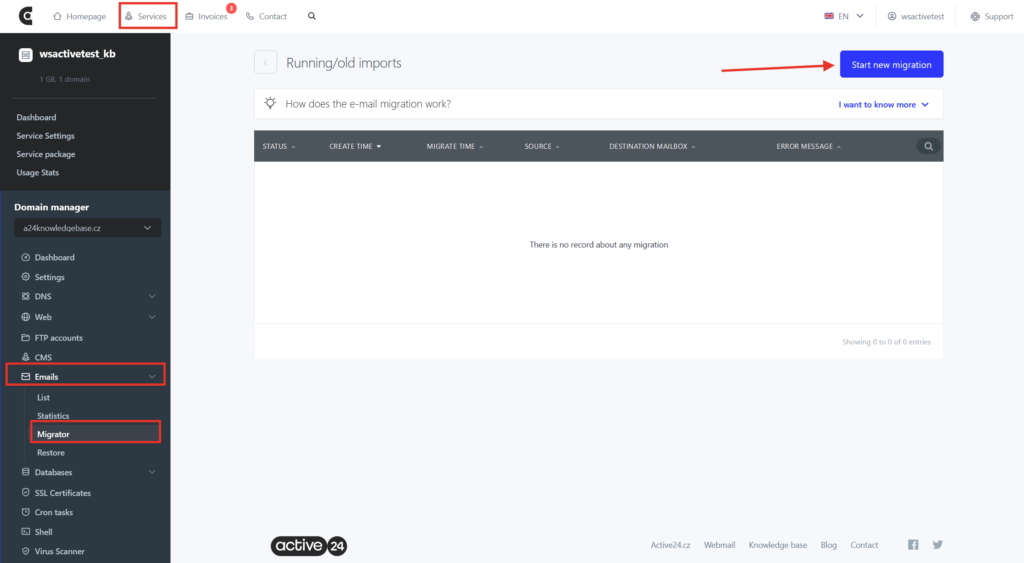
How to setup migration
- Log in to the WebAdmin
- Select your domain in the list of Services
- In the left menu select E-mails
- Select Migrator under the E-mails section. Here you can display the list of e-mail migrations or Set a new migration.
Migration details
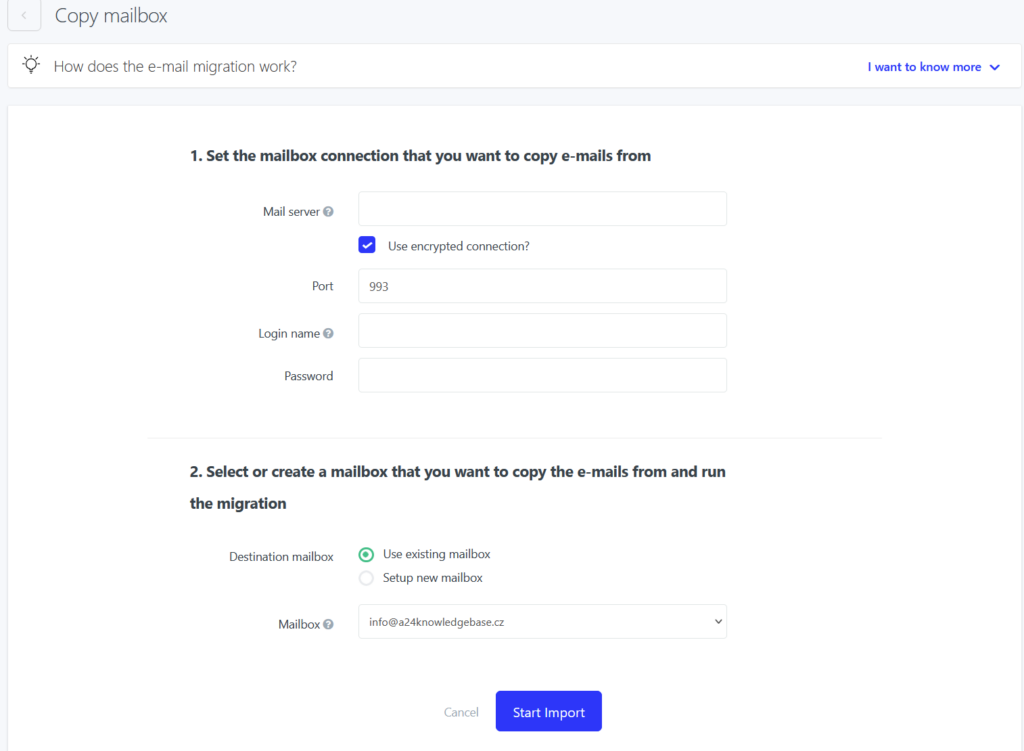
Here are the fields you need to fill in order to successfully migrate your mailbox.
- Mailserver – address of mail server, e.g. Active24 uses imap.websupport.cz if you can’t look up your mail server address, contact your email provider for correct settings
- Username – Email address that you want to migrate e.g. info@yourdomain.com
- Password – password for migrated e-mail
- Destination mailbox – you can select existing mailbox or create new
After you fill in the details and select destination mailbox, you can start the migration.
Mass e-mail migration (.csv)
If you want to copy multiple mailboxes, you can create .CSV file. This file has to contain all required information in correct form.
1 line = 1 mailbox
– each line has to contain information in quotes “” separated by semicolon ;
– required information: IMAP server address, port (most frequently 143 or 993), original e-mail address, password for the original address, destination address e.g. mailbox@domain.com, password for destination address (if the mailbox doesn’t exists already), if the destination address does exist, insert only “”.
– Example of .CSV file:
“imap.websupport.sk”;”993″;”original@email.com”;”MyPassword”;”existing_destination@email.com”;””;
“imap.websupport.sk”;”993″;”original@email.com”;”MyPassword”;”new_destination@email.com”;”NewPassword”;
…
With filled .CSV file simply select this file and start the migration as shown in “How to setup migration” above and then scroll down to the Mass migration section:
