Any android phone can download a myriad of apps in which you can manage your emails. Setup for these apps can differ only visually – settings is always the same.
For Android we recommend to use Gmail app, which comes pre-installed in most cases.
Manual settings
When you first load the app, you will be asked to add account right away.
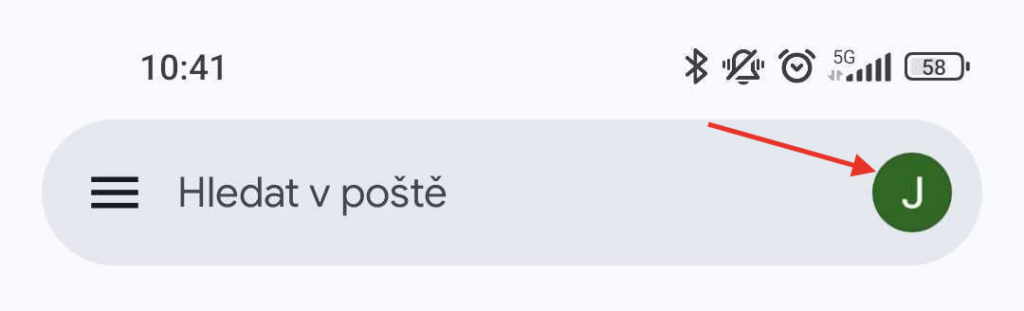
If you already have any email account added, select the account avatar in the search field and there you will see option to Add new account.
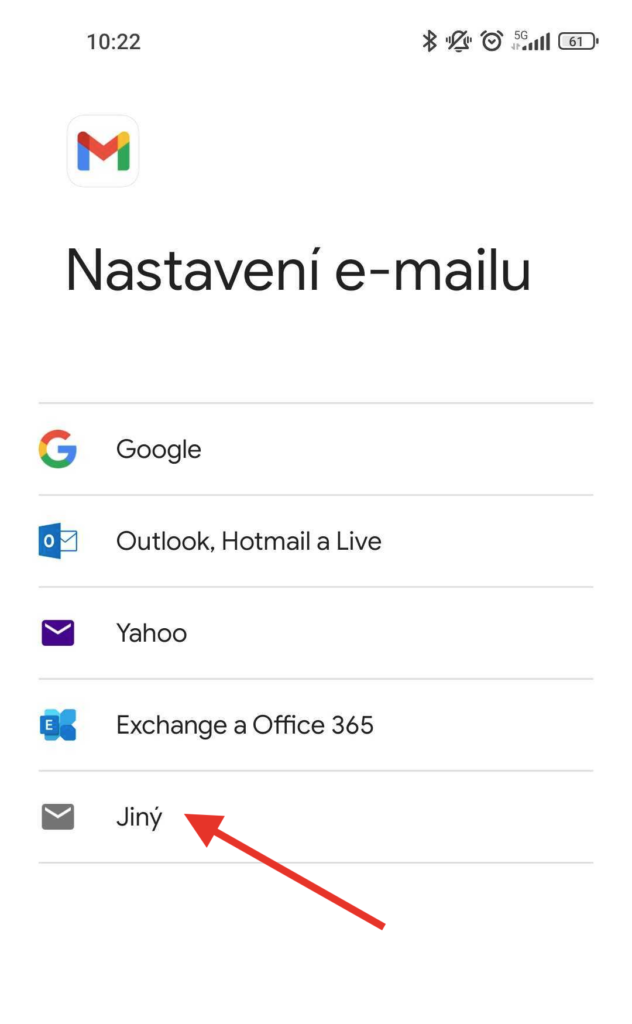
1. Select Other as type of your email
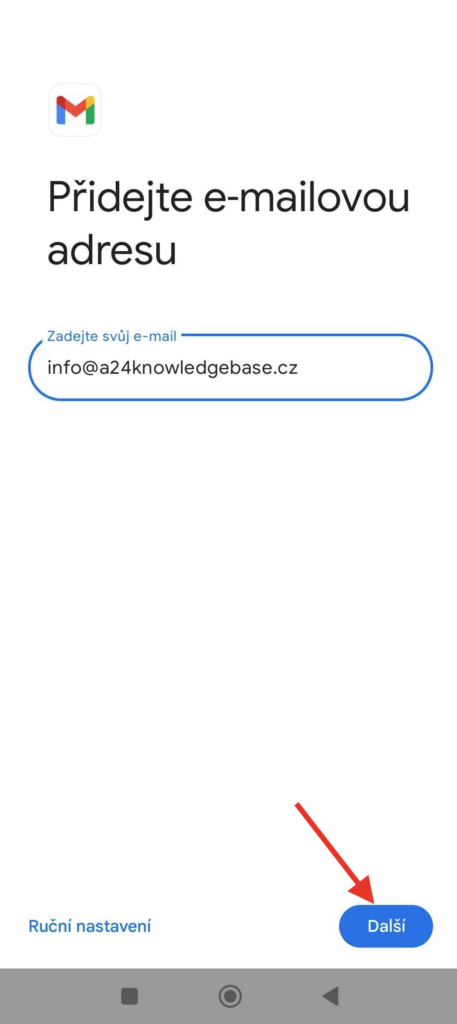
2. In the next step enter your e-mail address you want to add to the client, then press Next
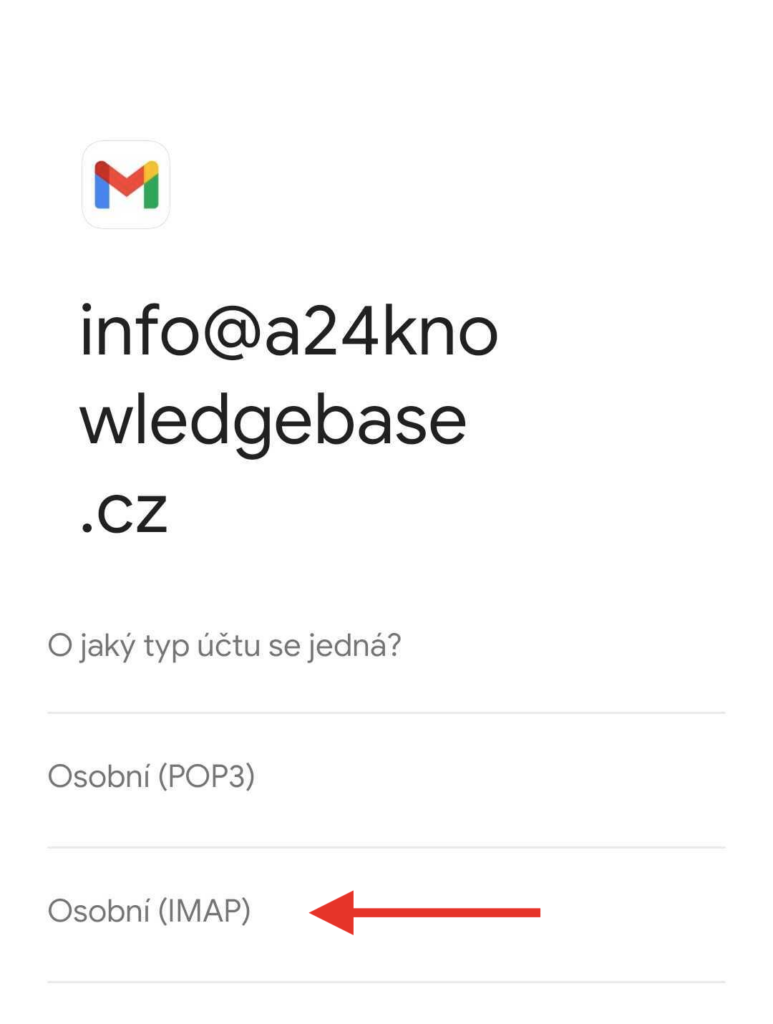
3. Select type of your account – we recommend IMAP
You can find the difference between IMAP and POP in other article.
4. Enter your password. Then continue.
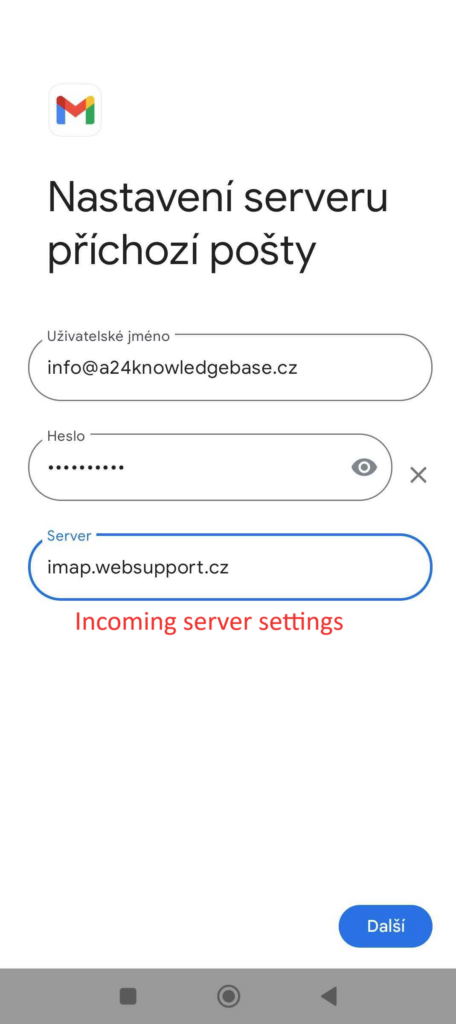
5. Next you will configure the server settings for incoming emails. Username and password should be already filled – if not enter it again. As a Server, enter the appropriate server for your type (IMAP or POP)
Settings for IMAP and POP3 are the following:
IMAP
Server: imap.websupport.cz
If necessary, you can also add encrypted connection with SSL use port 993.
POP3
Server: pop3.websupport.cz
If necessary, you can also add encrypted connection with SSL use port 995.
6. For outgoing e-mails set server as follows:
Username is again a whole e-mail address
Server SMTP: smtp.websupport.cz
For encrypted connection with SSL use port 465.
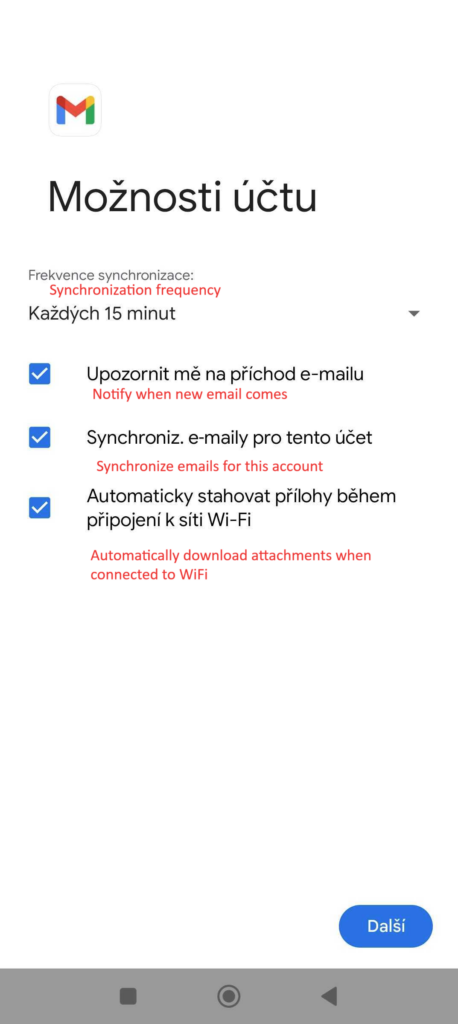
7. As a last step set up notification and synchronization settings.
To finish settings, select blue button Continue.