SSL certificates ensures two main functions: encryption of data transfer between visitor’s browser and server, and confirming identity of the server operator.
Certificate is installed via WebAdmin for any shared hosting (when the SSL certificate is purchased with us the installation is automatic even), but this does not apply to the virtual server – SSL certificates has to be installed manually.
Copying necessary files
As the bare minimum for correct function of the SSL certificate you require two files: private key file, usually with the extension .key, and the file of the certificate (*.crt).
In many cases the certificate authority (CA) provides also an intermediate certificate, sometimes called certificate chain or bundle. This file is actually a certificate set that determines the relationship with the CA, that generated the certificate, and with other superior certificate authorities.
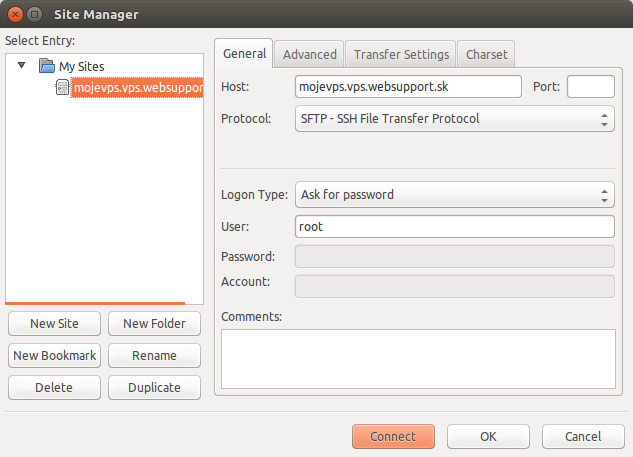
Files on VPS can be copied via programs WinSCP or FileZilla. To log in use SFTP file transfer and for login use the credentials you received on e-mail after the VPS was created.

Copy the *.crt and *.key files to the directory /etc/ssl/<domena>/:

Editing Apache2 configuration
To correct function of the certificate you need to edit the Apache webserver settings – VHost of the domain, for which the SSL certificate was issued to be more precise. We can locate it in the directory /etc/apache2/sites-enabled/.
Open in the text editor. What we need are the following sections:
 <VirtualHost *:80>


         DocumentRoot /data/web/mydomain.tld/web


         ServerName mydomain.tld


         ServerAlias www.mydomain.tld


         ErrorLog /data/web/mydomain.tld/logs/error_log


         CustomLog /data/web/mydomain.tld/logs/access_log common


 </VirtualHost>


 <VirtualHost *:80>


         VirtualDocumentRoot /data/web/mojadomena.sk/sub/%-3


         ServerName mydomain.tld


         ServerAlias *.mydomain.tld


         ErrorLog /data/web/mydomain.tld/logs/error_log


         CustomLog /data/web/mydomain.tld/logs/access_log common


 </VirtualHost>
Tieto sekcie v konfiguračnom súbore zduplikujeme a v ich novej kópii spravíme drobné zmeny:
<VirtualHost *:443>
        DocumentRoot /data/web/mydomain.tld/web
        ServerName mydomain.tld
        ServerAlias www.mydomain.tld
        ErrorLog /data/web/mydomain.tld/logs/error_log
        CustomLog /data/web/mydomain.tld/logs/access_log common


        SSLEngine on
        SSLCertificateFile /etc/ssl/mydomain.tld/server.crt
        SSLCertificateKeyFile /etc/ssl/mydomain.tld/server.key
</VirtualHost>


<VirtualHost *:443>
        VirtualDocumentRoot /data/web/mydomain.tld/sub/%-3
        ServerName mydomain.tld
        ServerAlias *.mydomain.tld
        ErrorLog /data/web/mydomain.tld/logs/error_log
        CustomLog /data/web/mydomain.tld/logs/access_log common


        SSLEngine on
        SSLCertificateFile /etc/ssl/mydomain.tld/server.crt
        SSLCertificateKeyFile /etc/ssl/mydomain.tld/server.key
</VirtualHost>
In a case you have an intermediate certificate as well, you can add it via following line to each of the sections:
SSLCertificateChainFile /etc/ssl/mydomain.tld/server.chain.crt
New configuration can be tested with a command apache2ctl -t and if everything is alright, we restart the Apache with a command apache2ctl restart
