If you need to add new mailbox to your account or edit or delete some of your mailboxes, you can do so from your Webadmin.
You can also find here advanced settings like allowed countries and IP addresses from where you can log in to your mailbox, contacts settings and email protocols.
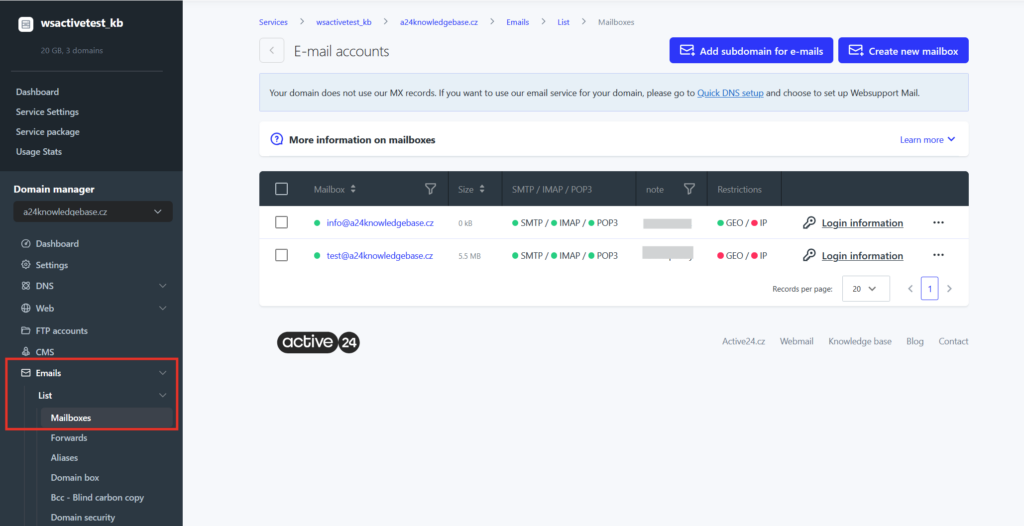
1. Log in to the Webadmin
2. In the section Services click on your domain
3. Click on the section E-mails in the left menu
4. In the list of Mailboxes you can see already created mailboxes (if any) and you can Create new mailbox, see Login information, via 3 dots next to the mailbox you can also see other settings or option to delete the mailbox.
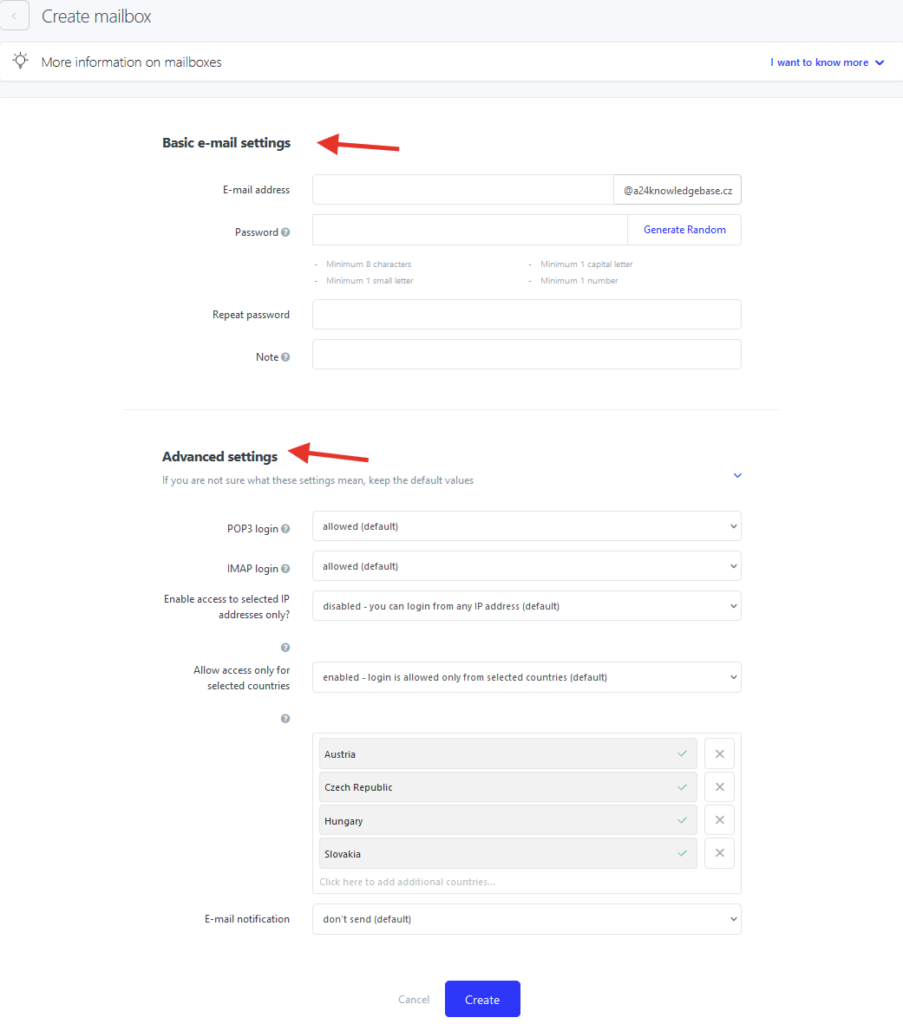
Create new mailbox
You can create a new mailbox under your domain by simply selecting this option. You can fill in the name and password. You will see two parts – basic and advanced settings.
Basic settings
Email address – here you enter the name of your mailbox
Password – enter password for your mailbox. Password must be at least 8 characters long with lower and upper case letters, numbers and special characters. Password cannot be accessed anytime later, it can only be changed.
Note – this is optional field where you can make a note visible only in Webadmin to distinguish the mailbox
Advanced settings
POP3 login– allow or deny login with protocol POP3
IMAP login – allow or deny login with protocol IMAP
IP protection – enable login to the mailbox from specified IP addresses only
GEO protection – enable login to the mailbox only from selected countries
If you are unsure what to select, you can use the default settings.