To manage your email accounts on macOS devices, you can use the Mozilla Thunderbird email client, which you can download from their official website. In this article, we’ll take a look at its settings.
Manual settings
1. In the top menu, click on Burger menu (3 lines on the top right) and then click on Account settings.
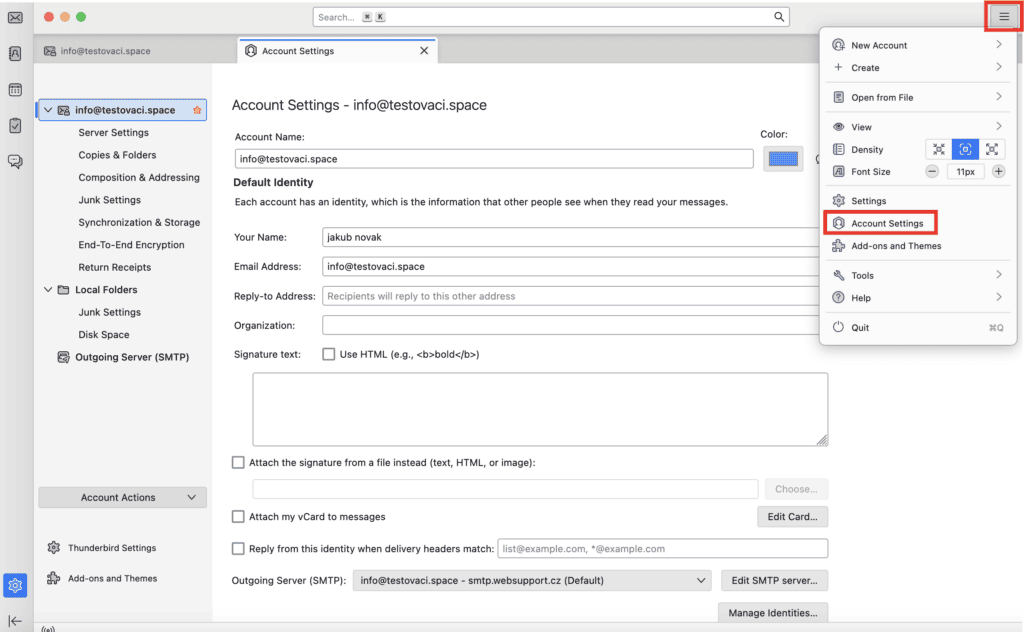
2. In the Account Settings window, click Account actions > Add Mail Account.

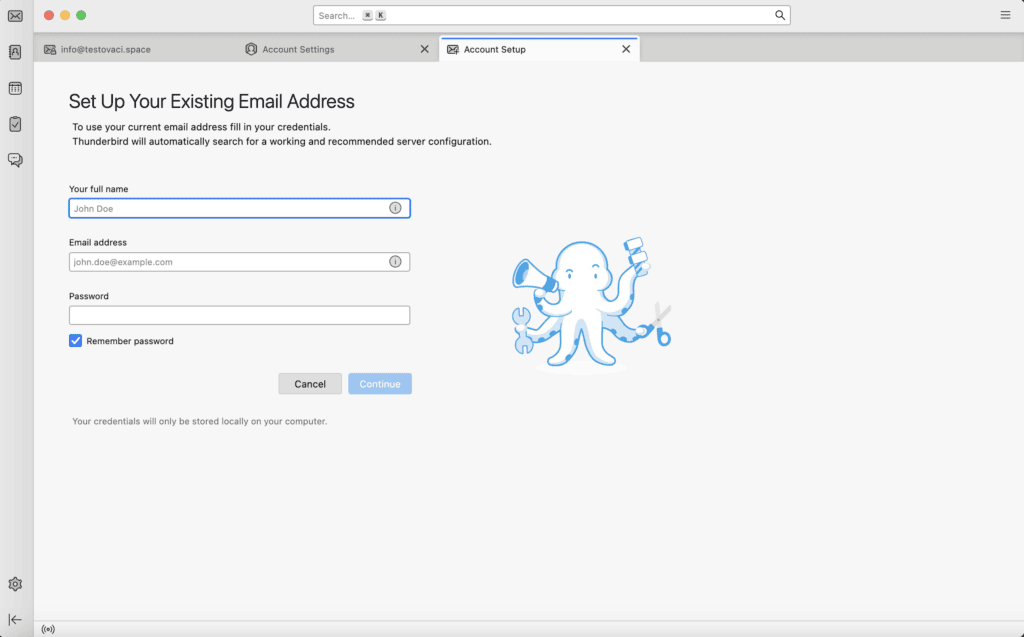
3. Fill in your name, email address and password. Once completed, click Continue.
4. In the bottom left corner, click Manual settings.
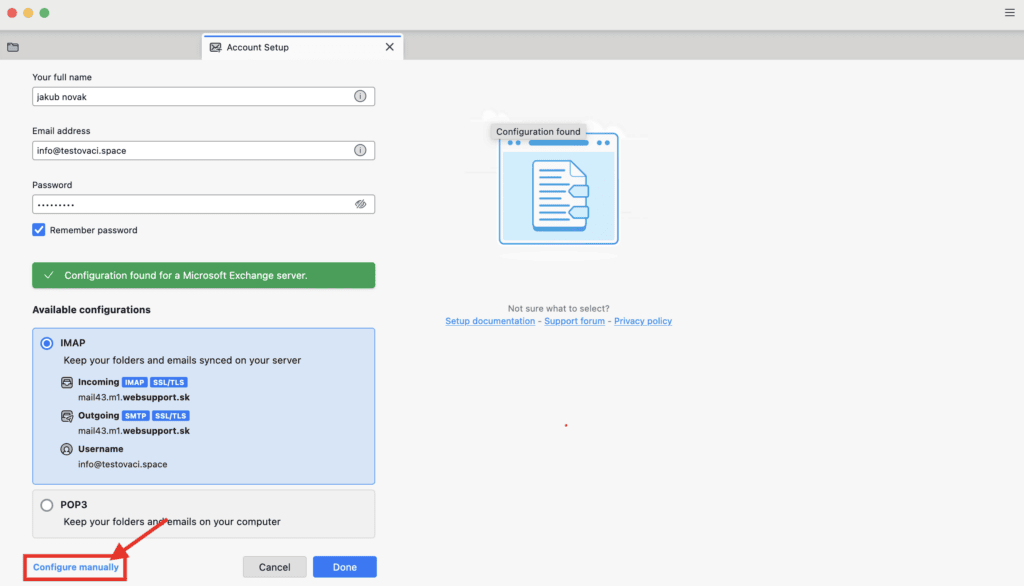
5. Enter your email address as your username.
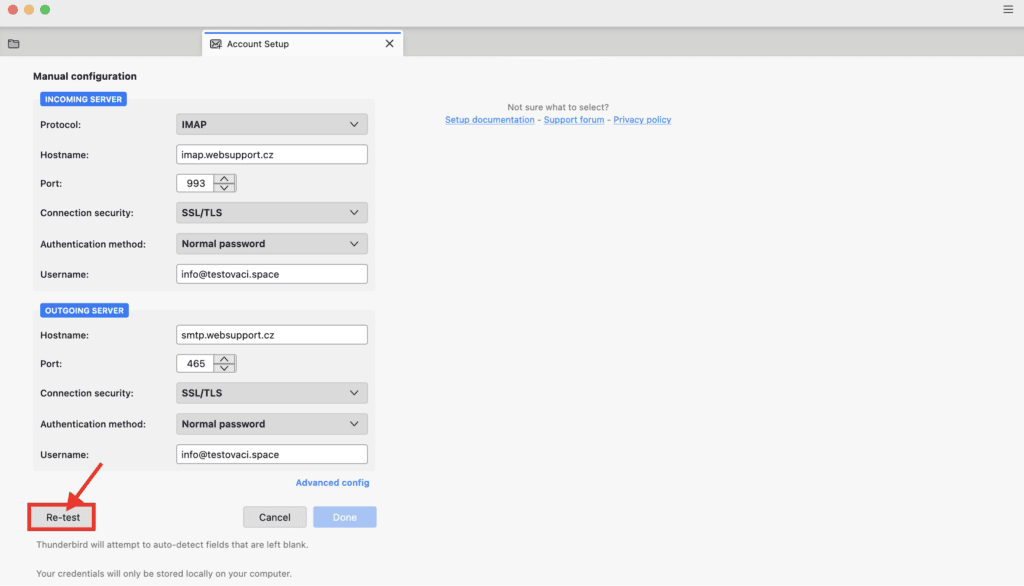
Set the values for receiving:
Choose IMAP or POP3 as the account type. You can read more about IMAP and POP3 in our tutorial.
IMAP
Server: imap.websupport.cz
For secure encryption (SSL) use port 993
POP3
Server: pop3.websupport.cz
For secure encryption (SSL) use port 995
Set the values for sending:
SMTP
Server: smtp.websupport.cz
For secure encryption (SSL) use port 465
6. Once you have entered the data, click Re-test the settings.
7. After successfully testing the connection to the server, click Done to complete the setup.

You now have a mailbox connected through the Thunderbird email client. Your mail will sync within a few minutes (it can take tens of minutes for a large number of emails).