The calendar and contacts settings for Business Mail on Android are pretty much the same for any app. By default, this is achieved via an Exchange connection.
This tutorial describes the settings for Gmail, which is often pre-installed and widely used. However, if you are using another application that supports Exchange connections, the settings will be the same.
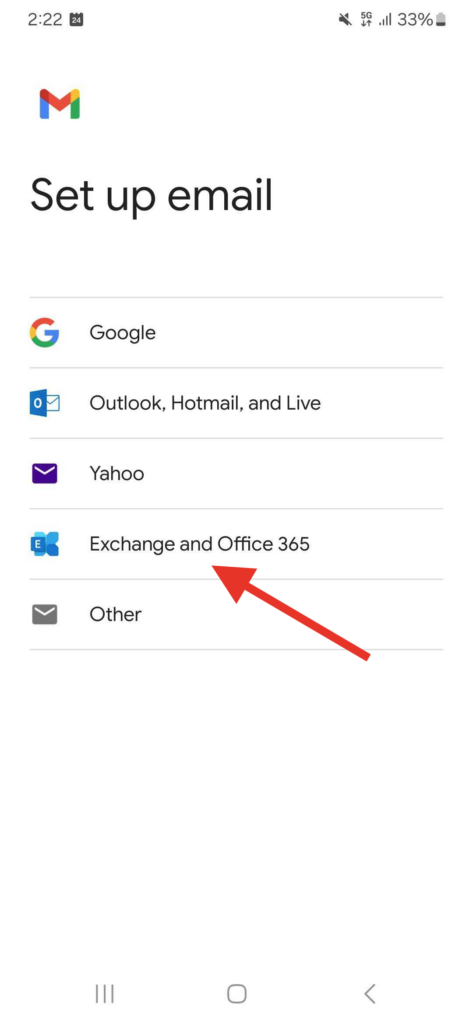
- Add a new email account (the page will appear automatically for a new device that does not have an account assigned yet)
- In the first setup step, select Exchange a Office 365
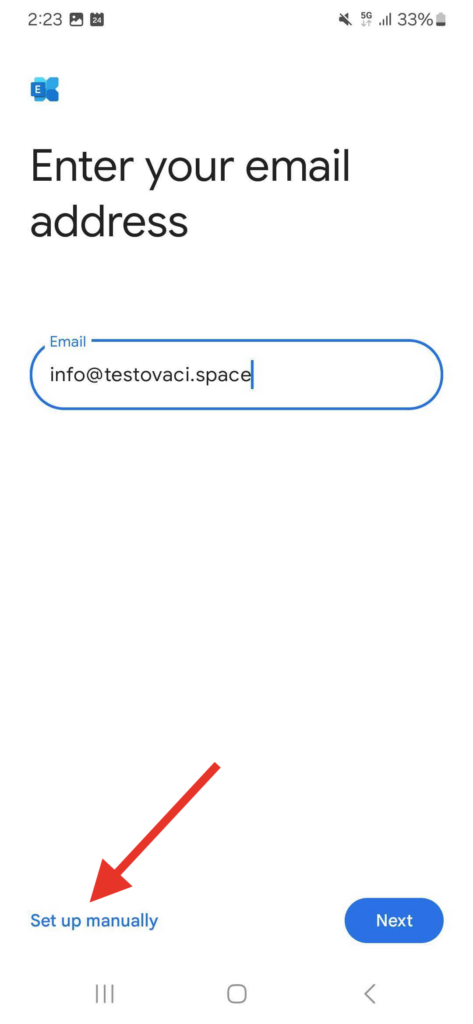
2. Enter your email address and click Set up manually.
3. The next step is to set up the email, i.e. add the correct password, check that your email is spelled correctly and add the server and port. For the server and port, the settings are as follows:
server: mail43.m1.websupport.cz
port: 443
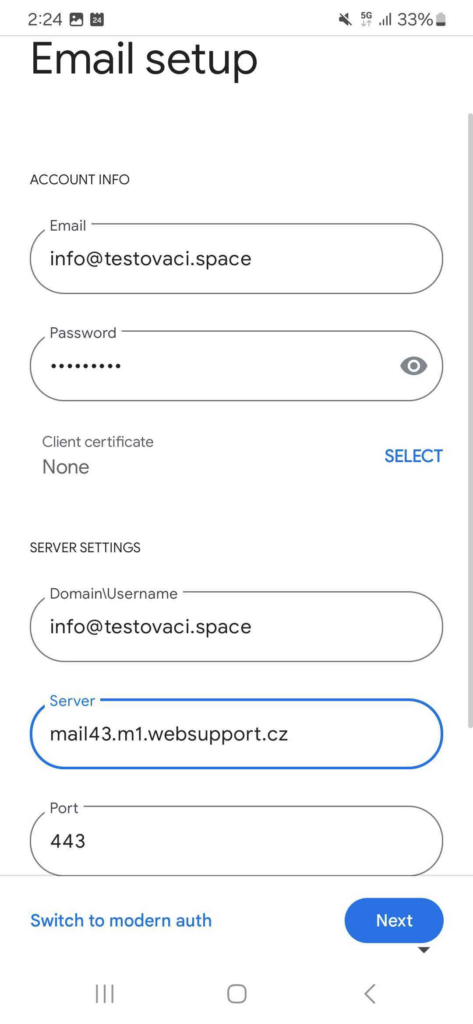
After setting up, click Next
4. After a moment of loading, a confirmation screen will show that the email has been added.
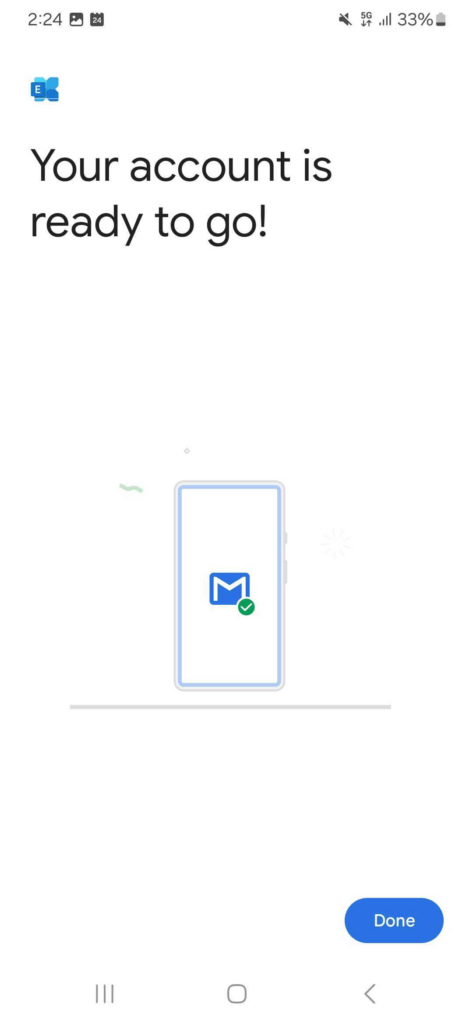
When you click Done, you’ll be able to view your synced emails, and when you click on Calendar and Contacts, you’ll see these items synced as well.
The initial synchronization can take longer, in matter of minutes, if you have a large number of calendar events or contacts.