In this guide we will show you how to change the sender address and how to add the option to send from WordPress via SMTP.
Hint: In the case you send newsletter from WordPress or you have your eshop built on it, you can use our guide for more advanced configuration.
Setting sender’s address
WordPress in the basic installation does not offer many setting for sending e-mails, it uses function php mail() with help of its own feature wp_mail.
As the basic address it used the one you set during installation.
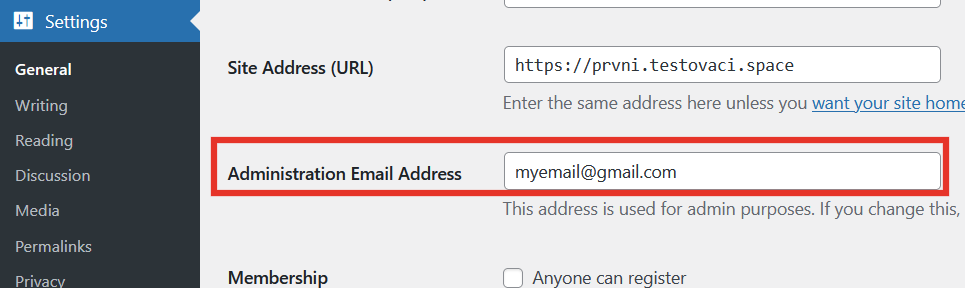
If you want to change the address from where you will send notification and registration e-mails, go to the Settings > General.
Entered address must exist in our system either as a mailbox or as an allowed address, that can be added to the whitelist after you contact our support.
This setting can (but not necessarily) influence the e-mail address for sending e-mails via plugins.
In most cases the plugins tend to use this address, but to call the wp_mail with your own parameters, e.g. address of the user, it is useful to test the setting with multiple addresses before you go online., for the sending may be influenced by other plugins, some of them set other sender e-mail address (e.g. customer address).
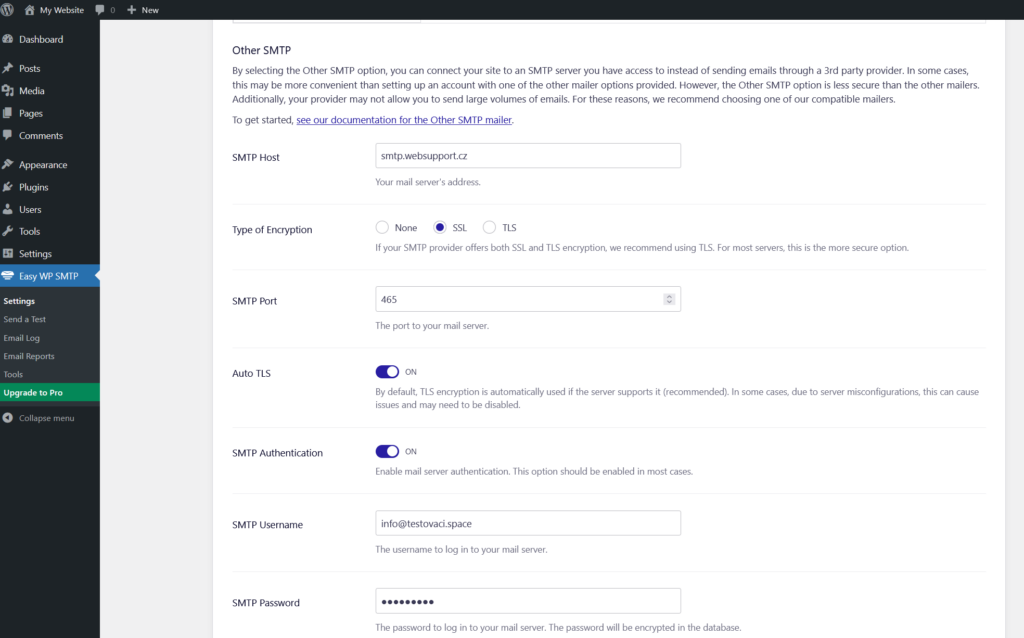
Setting sending via protocol SMTP
If your e-mails are not sent from your WordPress, in many cases the fastest way to solve this problem is to send via SMTP server- It is also the solution if you want to send via Gmail or other provider of mail services. Support of SMTP sending is not included in the basic installation of WordPress, but there are many SMTP plugins available.
Hint: For example to use OAuth2 from google a good choice is Postman, for dosing sending the best is Mailer .
In the guide we use Easy WP SMTP, but the guide and settings are similar for all plugins of this kind.
Plugin can be installed in the Plugins section in wp-admin/. After installing the plugin needs to be activated in the WordPress interface:
For using SMTP server of a different provider use the parameters that you received from your provider. Our best experience comes with use of port 465 and SSL encryption. The setting should look like this: