If you want to test the functionality of your website without working domain or your want to migrate existing web to a new server and you do not want to change DNS yet but you want to prepare it in advance, there are two simple tricks, by which the browser will load your website without the change of DNS.
Special URL address
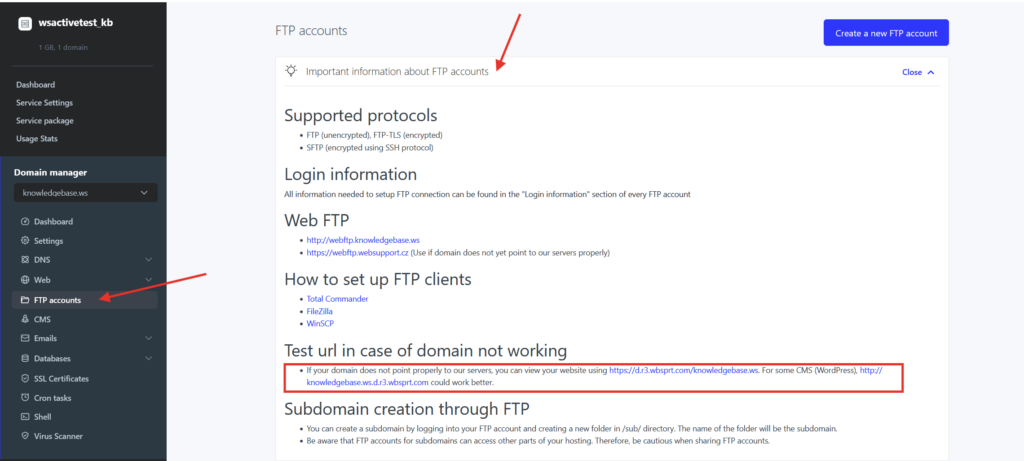
To simplify the testing of your website with non-functioning domain we have developed an option to use special URL that will allow you to display your website on our hosting. The form of this special URL can be obtained after you log in to the WebAdmin.
- In the Services select your domain
2. In the left menu select FTP accounts
3. Click on the “Important information about FTP accounts” banner
4. In the section Test url in case of domain not working

Editing hosts file
This method is recommended for testing WordPress or other complex application. Hosts file is stored on your PC and it contains information about where your browser shall look for the IP address of a specific website. If you have your webhosting configure already all you need to do is to change a record in this file.
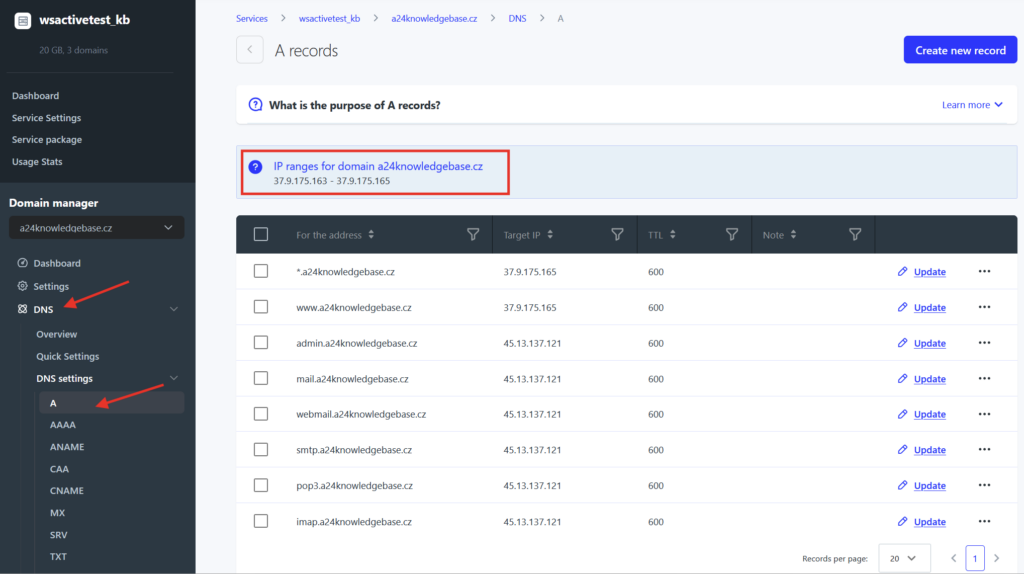
IP address that can be used for hosts is located with these steps:
- Log in to the WebAdmin
- Select your domain from under the Services section.
- In the left menu select DNS and then DNS settings, display A records.
- In this section above the A records is displayed a predetermined IP address of your domain.

Before you continue we recommend to close all other windows of the web browser to make sure that the editing of the hosts file will activate.
Operating system Linux and macOS
The best way to work with the file Hosts is to use the application Terminal, which is located at the Utility directory on macOS. Terminal can be searched for and run also via Spotlight feature.On Linux it can be found easily in the application section.

After you open the terminal enter the following command:
sudo nano /etc/hosts
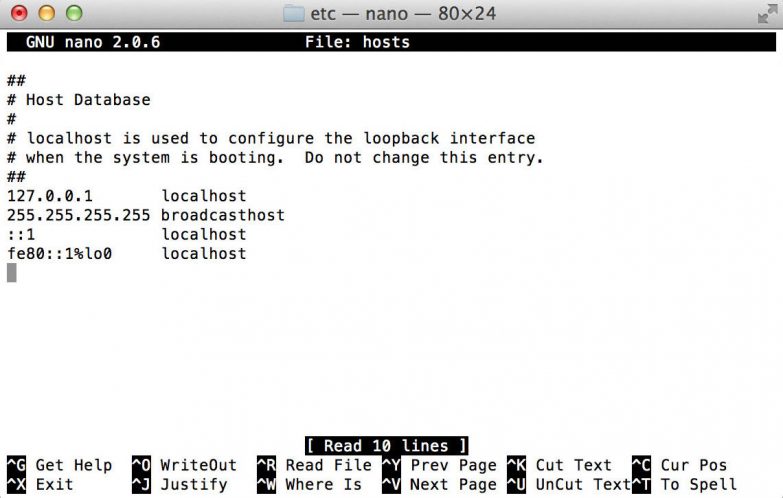
Ten press ENTER and you will be asked to enter the password. After you enter the password a text editor Nano will open where you can edit the file. All new records are to be added at the end of the file. To navigate to the end you can use arrow keys on the keyboard. The current cursor position is highlighted with grey color. The document may look like this:

To the hosts file enter a line with IP address, that you found at the beginning of this guide, press the tab key and enter the name of your domain in the form of www.yourdomain.tld yourdomain.tld, these are already separated with a space. Be careful with the white space characters, IP address and domain has to be separated with a tab, at the same time there can’t be any additional spaces. Example:
37.9.175.3 [tab] yourdomain.tld www.yourdomain.tld
After the editing is complete press control + O to prompt Saving option. Then press ENTER to save the record and then press control + X. As the last step it will be necessary to flush the DNS cache, which will make the computer aware about the changes. Enter this command:
sudo killall -HUP mDNSResponder
Well done! Website is correctly loading from our server.
Operating system Windows
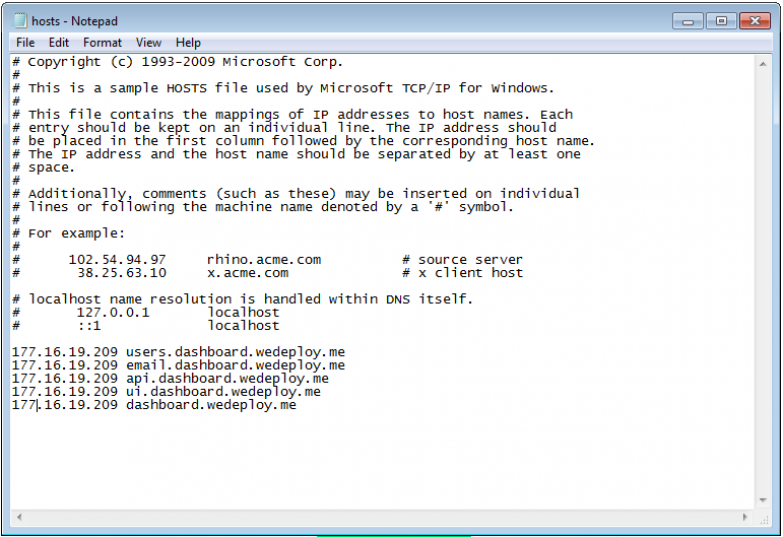
The process is different for devices with operating system Windows. The change is not made via command line (terminal). The file has to be located manually in this directory:
c:/windows/system32/drivers/etc
Open the file as administrator (right click > Open as Administrator). Add a new line to the hosts file, on the new line enter the IP address you found at the beginning of this guide, press the tab key and enter your domain name www.yourdomain.tld yourdomain.tld, these are already separated by a space.

Be careful with the white space characters, IP address and domain has to be separated with a tab, at the same time there can’t be any additional spaces. For example:
37.9.175.3  [tab]  yourdomain.tld
37.9.175.3  [tab] www.yourdomain.tld
Save the file and delete the browser cache.
Well done! Website is correctly loading from our server.
