CalDav synchronizer is one of the options to connect your calendar and contacts to Outlook. It is an add-on that you can install and use in your Outlook.
This article is about setting up Microsoft Outlook email on a Windows device.
You can download the supplement using the following link:
More information about the plugin can be found on the official website of the plugin: https://caldavsynchronizer.org/
The CaldavSynchronizer plugin is only used to add contacts and calendar. To add mail itself, you need to add the mailbox to Outlook in the standard way as an IMAP/POP3 mailbox, see the instructions for setting up email in Outlook.
Plugin settings
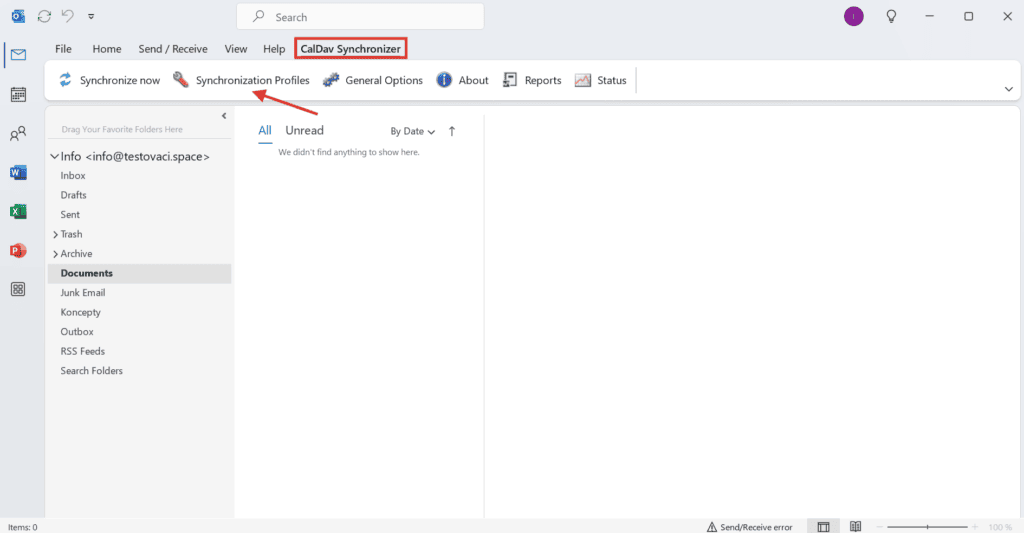
After simply installing the plugin, you will see a new tab in your Outlook.
- To set up your calendar and mail, go to “Synchronization Profiles”
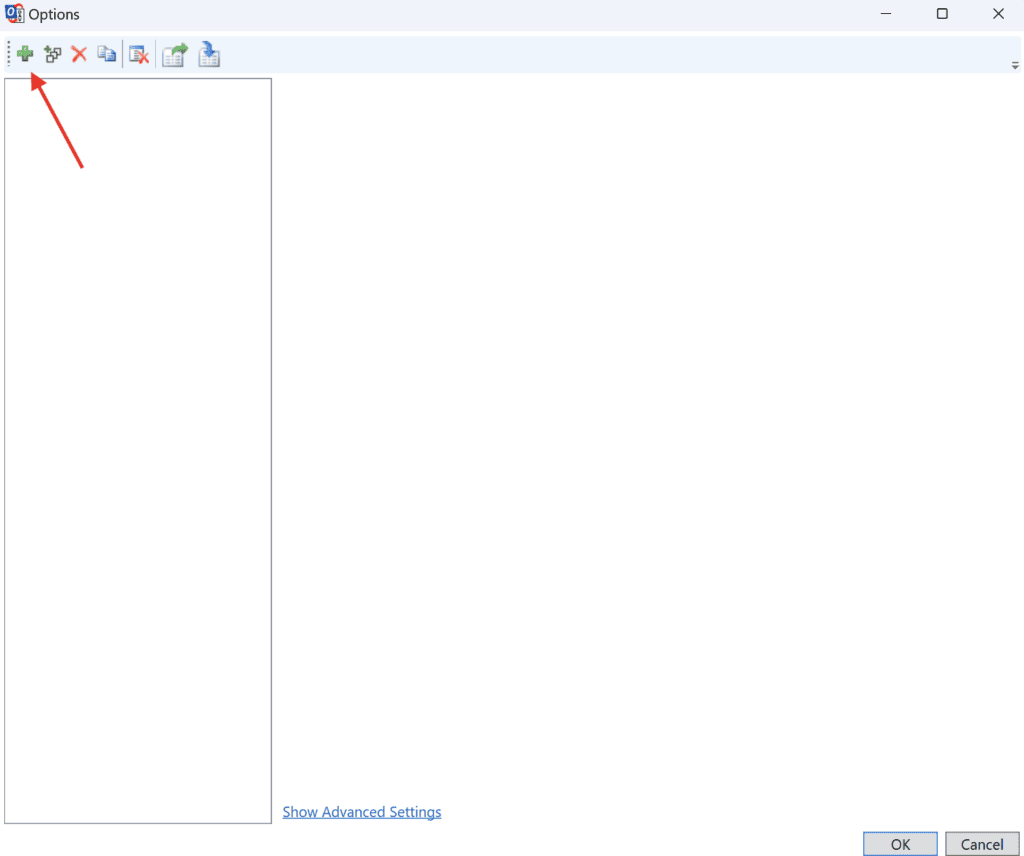
2. A new window will be displayed (blank for new settings). For further settings, click on the green plus sign at the top left
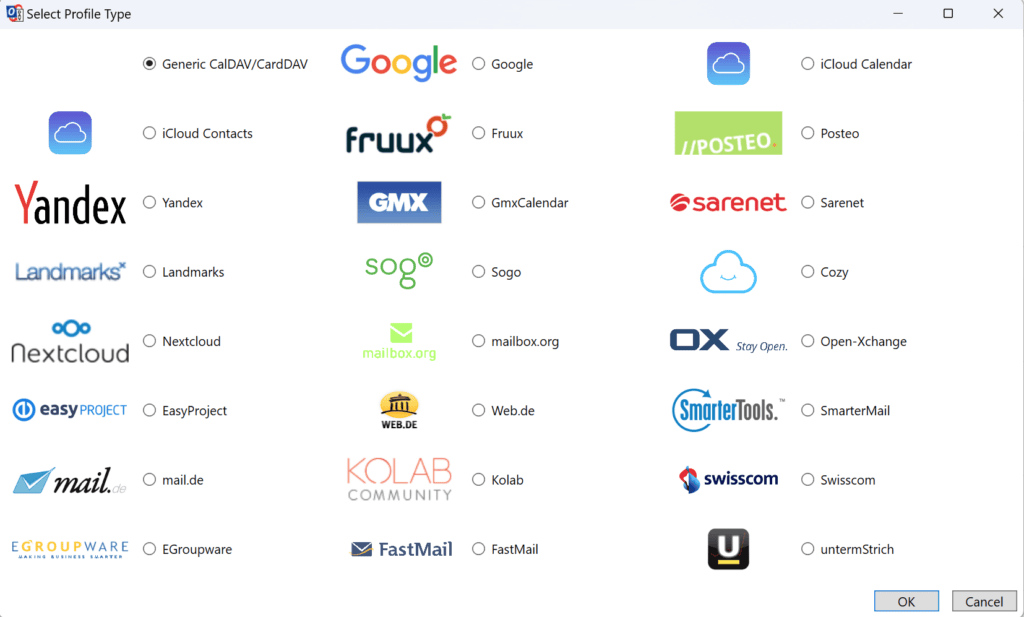
3. You will then see predefined options for different providers. Active24 is not among them, so keep the Generic CalDAV/CardDAV option selected
4. You will see the settings screen. Fill in the highlighted sections
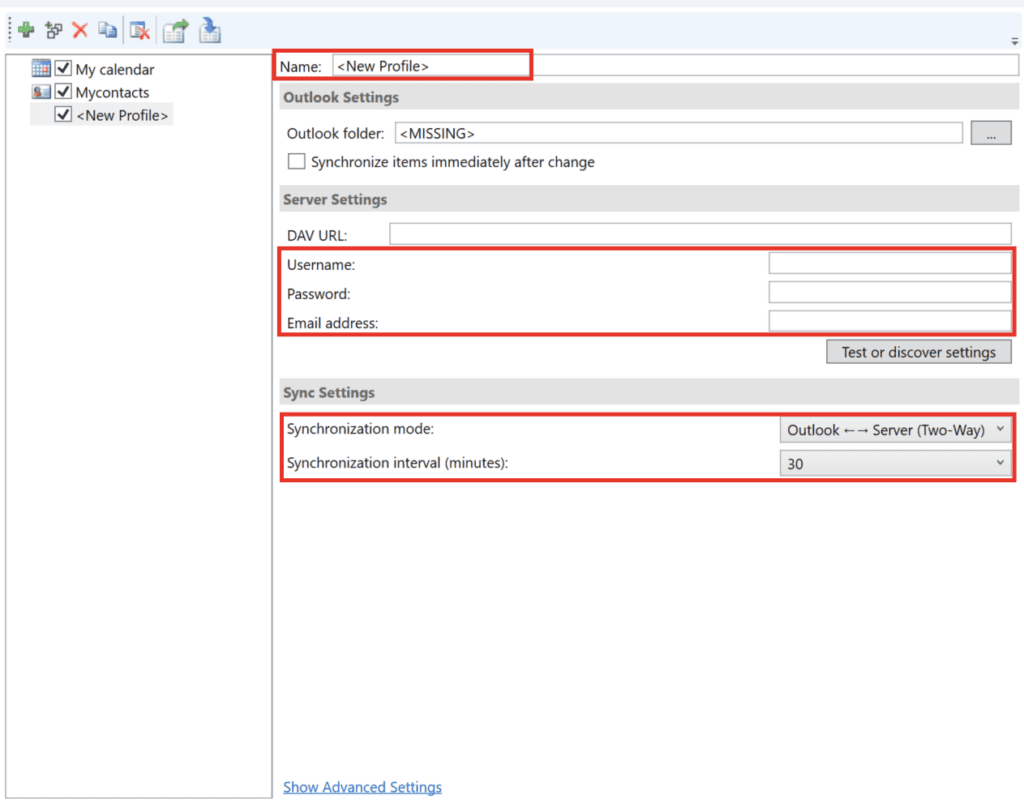
- Name = profile name. You can specify a name according to your own preferences
- Username = Add your email here
- Password = Fill in this field with the password to your email box
- Email address = Add your email here
- Synchronization mode = synchronization options. Here you can choose whether you want to download items from the server, upload items from your device to the server, or both (recommended, default)
- Synchronization interval = synchronization interval with the server. After this time (in minutes), the calendar/contacts will be synchronized with the server.
5. You will then need to set up the Outlook folder and DAV URL to proceed depending on whether you wish to set up a calendar or contacts.
a. Calendar
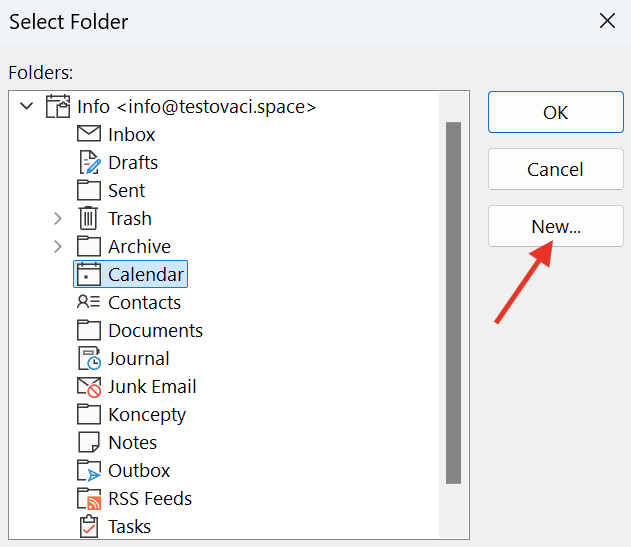
6. a. Once you have entered the other values, select the 3 dots next to the Outlook folder

You will see a window with a folder type selection. Select the Calendar folder. You can use this folder directly, but we recommend that you create a new folder via the “New…” button.
7. a. Name the new folder as you wish. Leave “Folder contains:” at Calendar Items
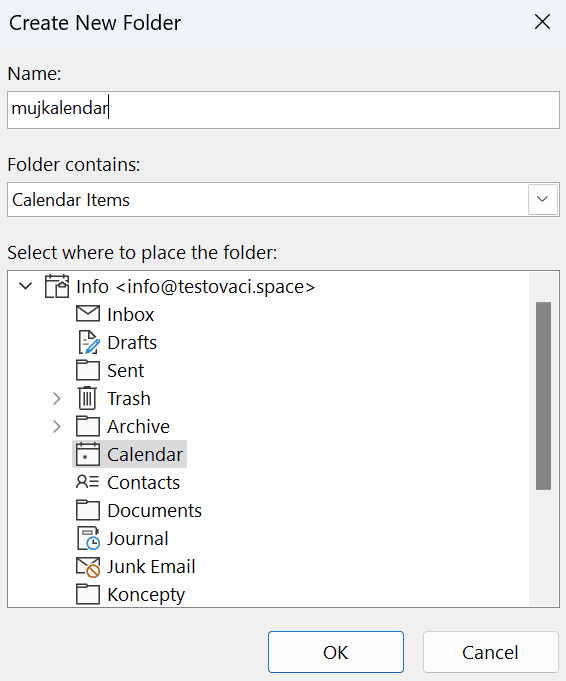
Confirm OK.
8. a. The folder will now appear in the folder selection overview. Select it by clicking OK.
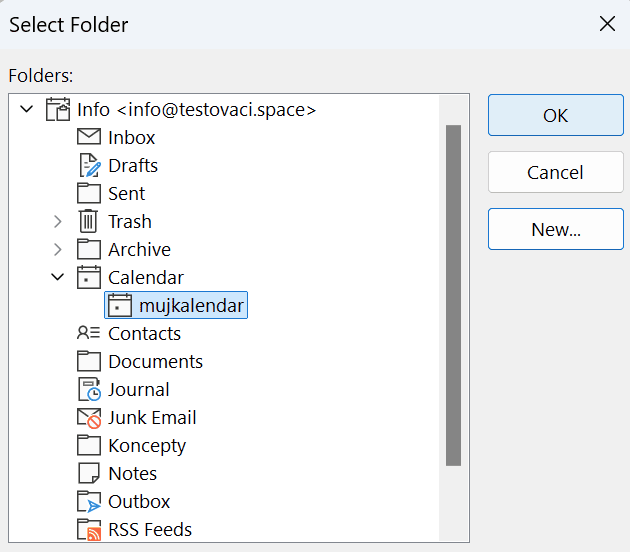
The folder will appear correctly in the initial settings. (At this step, the settings window may move to the background, you can find it by hovering over the Outlook icon on your computer’s tray).
9. a. Go to the DAV URL field:
Enter a URL in the box that contains the name of your mailbox and the path to your calendar. By default the URL is:
https://mail43.m1.websupport.cz/webdav/mailbox.name@domain.XY/Calendar/
(change mailbox.name@domain.XY for your email name)
The overall setup will look like this:
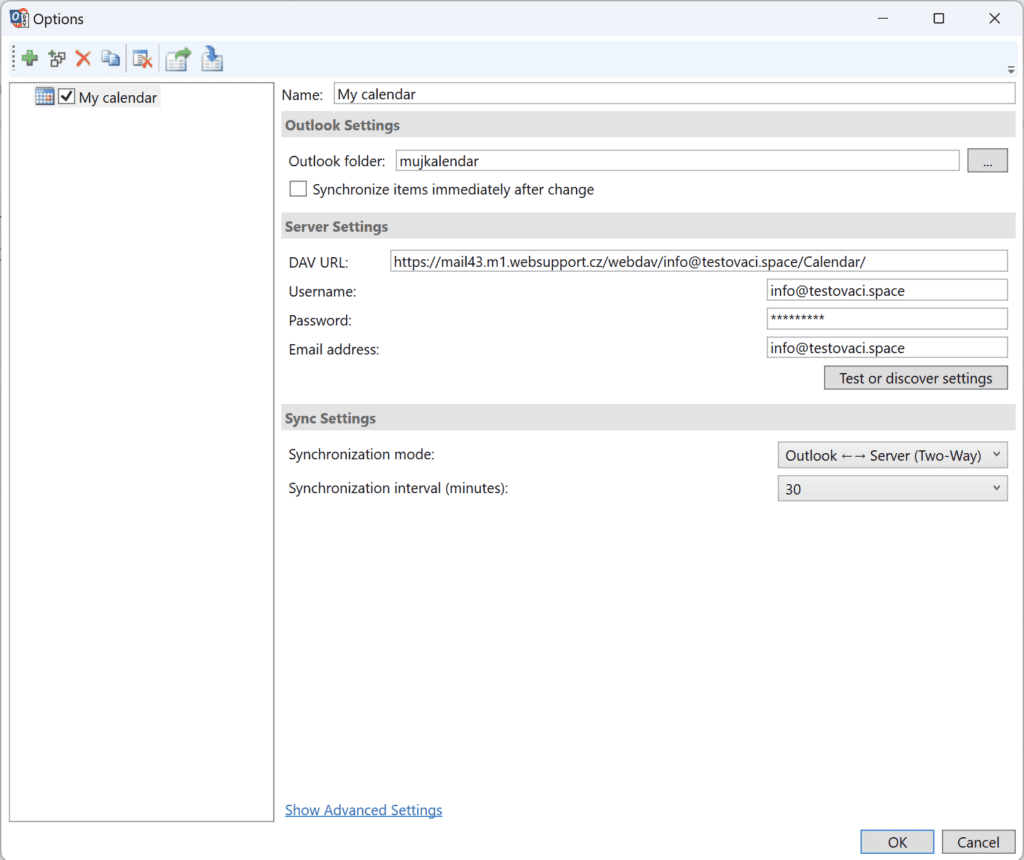
Confirm the settings via OK
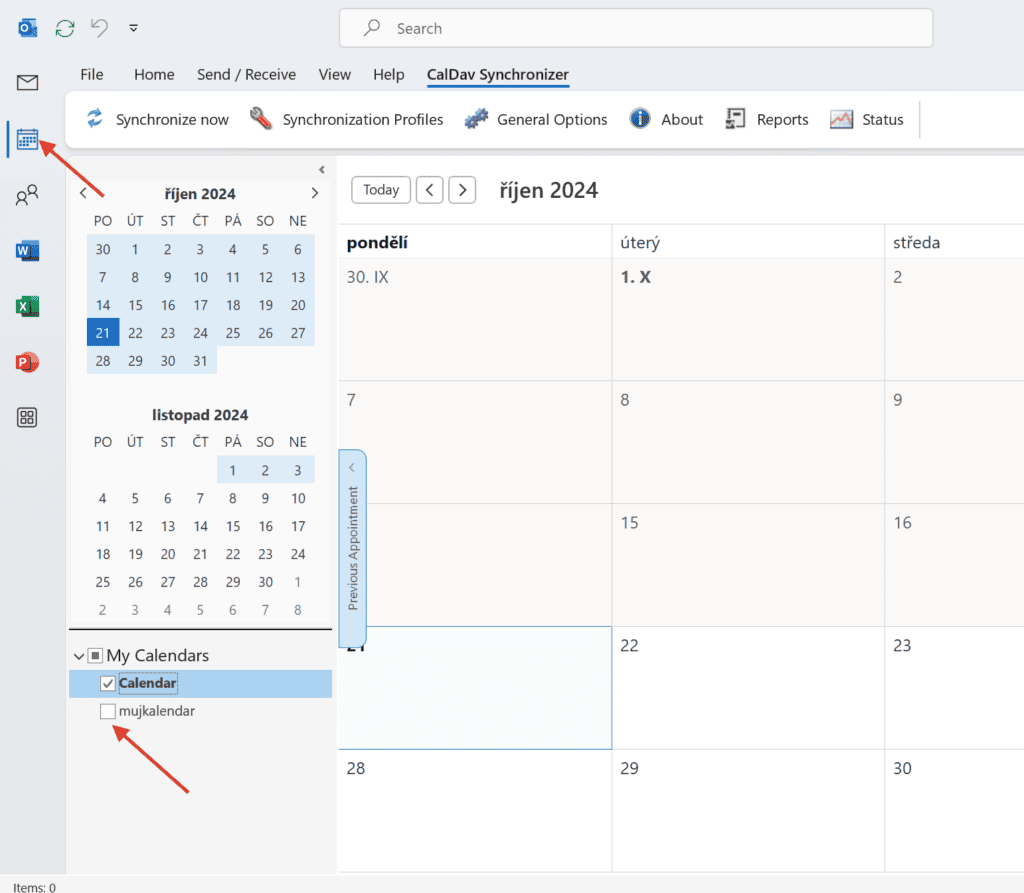
10. a. Now go to the Calendar section. You will see the new calendar among your calendars. To view it, you must click.
b. Contacts
6. b. Once you have entered the other values, select the 3 dots next to the Outlook folder

You will see a window with a folder type selection. Select the Contacts folder. You can use this folder directly, but we recommend that you create a new folder via the “New…” button.
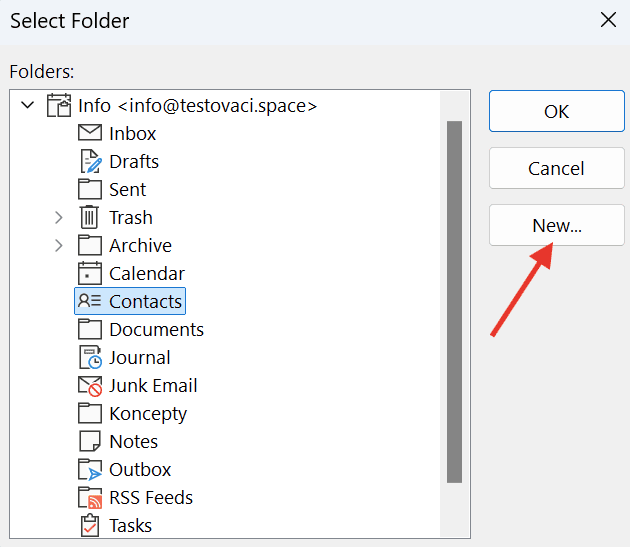
7. b. Name the new folder as you wish. Leave “Folder contains:” as Contact Items
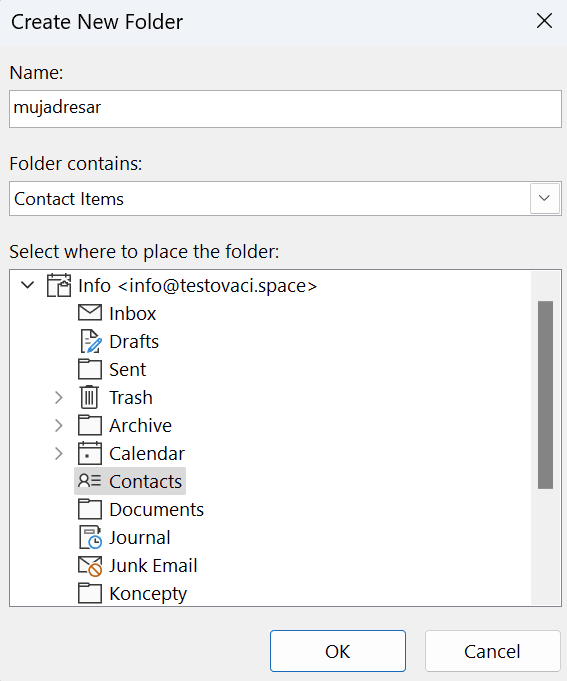
Confirm OK.
8. b. The folder will now appear in the folder selection overview. Select it by clicking OK.
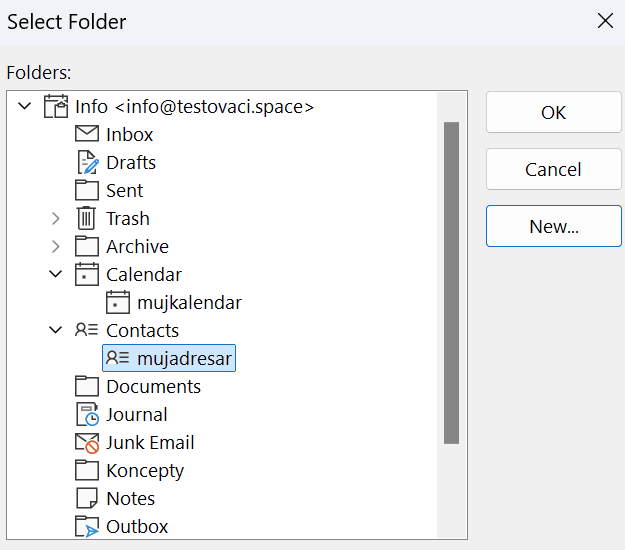
The folder will appear correctly in the initial settings. (At this step, the settings window may move to the background, you can find it by hovering over the Outlook icon on your computer’s start bar).
9. b. Go to the DAV URL field:
Enter a URL in the box that contains the name of your mailbox and the path to your contacts. By default the URL is:
https://mail43.m1.websupport.cz/webdav/mailbox.name@domain.XY/Contacts/
(change mailbox.name@domain.XY for your email name)
The overall setup will look like this:
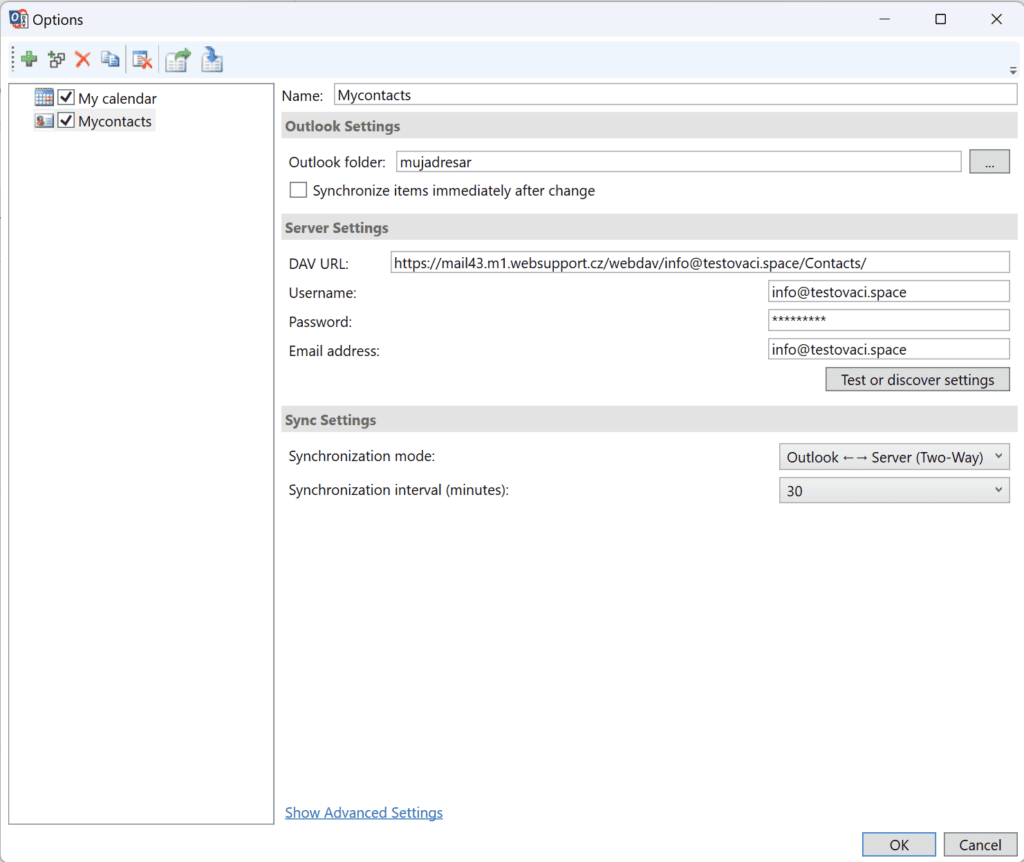
Confirm the settings via OK
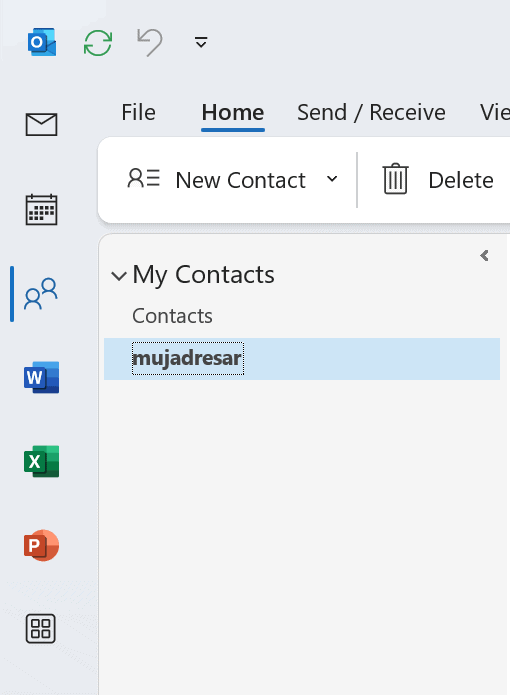
10. b. Now go to the Contacts section. You will see the new address book among your address books and click on it to see the specific contacts.
